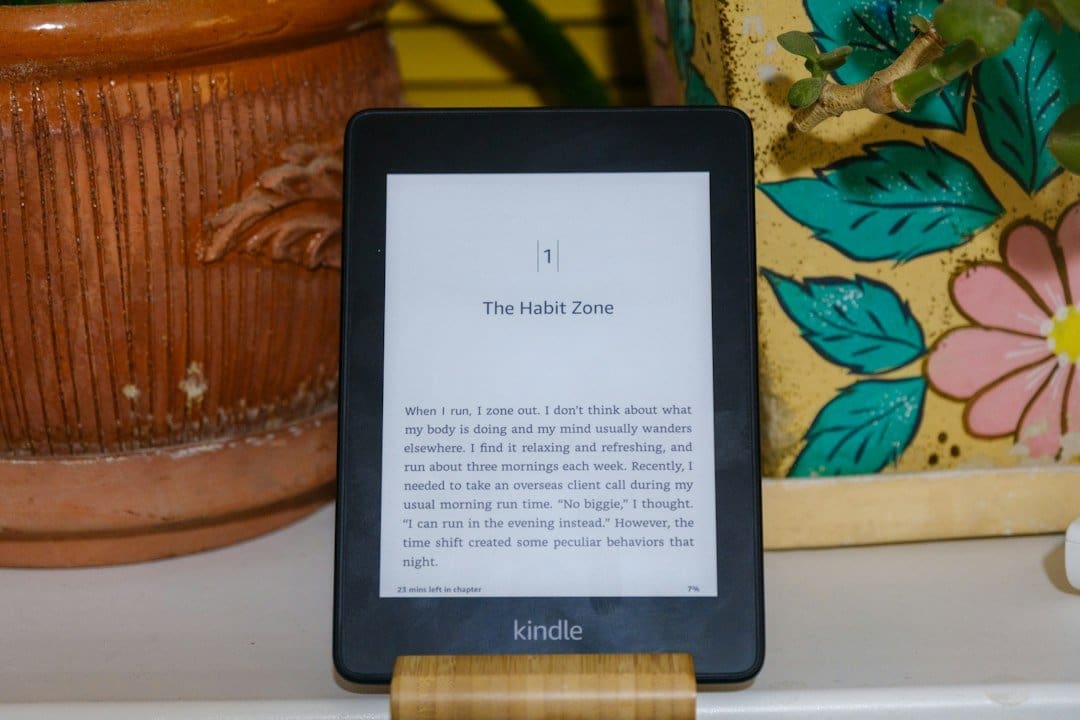
Unboxing and Initial Charge: Your First Steps
Congratulations! You’ve just acquired a fantastic e-reader, a portal to countless stories and endless knowledge. The journey to fully enjoying your Kindle begins with a simple unboxing and ensuring it’s ready for action. Don’t just rip open the packaging; take a moment to appreciate the sleek design and lightweight feel of your new device. You’ll find the Kindle itself, a USB-C charging cable (or micro-USB for older models), and a small quick-start guide. Resist the urge to immediately power it on and start exploring. The most crucial first step is to give your Kindle a proper initial charge.
The Importance of a Full Charge
While your Kindle might arrive with some battery life, it’s almost certainly not fully charged. To ensure optimal battery performance and avoid interruptions during your initial setup, plug it in. Use the provided USB cable and a wall adapter (often sold separately, but compatible with most smartphone chargers). Look for the small LED indicator light near the charging port. It will typically glow orange or amber while charging and turn green when the battery is full. This initial charge can take anywhere from a couple of hours to four or five, depending on the model and how depleted the battery is. Think of it as a crucial first meal for your e-reader; it sets the stage for a long and healthy battery life. Skipping this step can lead to a less smooth setup experience and might even shorten the overall lifespan of your battery in the long run, though modern batteries are much more forgiving.
Understanding Your Device’s Controls
While your Kindle charges, take a few moments to familiarize yourself with its physical layout. Most Kindles share similar control schemes, though there might be slight variations between models (Paperwhite, Oasis, basic Kindle). You’ll typically find a power button, usually located on the bottom edge or sometimes the side. This button serves multiple functions: a quick press will put your Kindle to sleep or wake it up, while a sustained press (usually a few seconds) will bring up a menu with options to restart or power off the device completely. Some Kindles, particularly older models or the Kindle Oasis, also feature physical page-turn buttons on the side. These can be incredibly convenient for one-handed reading. The charging port is self-explanatory. On the bottom or side, you might also find a small indicator light for charging or Wi-Fi activity. Becoming acquainted with these basic controls now will make navigation much more intuitive once your Kindle is fully powered up.
If you’re looking for a comprehensive guide on how to set up your Kindle the right way, you might also find the article on optimizing your reading experience quite helpful. This related article offers tips on customizing settings, managing your library, and discovering new features that can enhance your enjoyment of eBooks. You can check it out here: Optimize Your Kindle Reading Experience.
Connecting to the Digital World: Wi-Fi and Amazon Account

Once your Kindle is fully charged, it’s time to bring it to life by connecting it to your home Wi-Fi network and linking it to your Amazon account. This is where the magic truly begins, unlocking a vast library of books, audiobooks, and other content.
Establishing a Wi-Fi Connection
When you first power on your Kindle, you’ll be greeted by a welcome screen and prompted to select a language. After choosing your preferred language, the device will scan for available Wi-Fi networks. You’ll see a list of networks within range. Locate your home Wi-Fi network and tap on it. If your network is password-protected (which it absolutely should be for security reasons), you’ll be prompted to enter the password. Carefully type in your Wi-Fi password. It’s often case-sensitive, so pay close attention to capitalization. Once you’ve entered the password, tap “Connect” or “Join.” Your Kindle will attempt to establish a connection. If successful, you’ll see a confirmation message, and a Wi-Fi symbol will appear in the status bar at the top of the screen. If you encounter issues, double-check your password. If it still doesn’t connect, try moving closer to your Wi-Fi router or restarting the router itself. Sometimes, a simple reboot can resolve connectivity problems. This step is crucial for downloading books, syncing your progress, and accessing all of Amazon’s Kindle services.
Registering Your Kindle to Your Amazon Account
With Wi-Fi established, the next step is to register your Kindle to your Amazon account. If you purchased the Kindle directly from Amazon and selected the “Link to my Amazon account” option during checkout, your device might already be pre-registered. You’ll see your Amazon account email address displayed on the screen, and you can confirm this. If it’s not pre-registered or you purchased it from another retailer, you’ll be prompted to sign in to your Amazon account. Enter your Amazon email address or phone number and your Amazon password. Make sure to use the account you typically use for purchasing e-books or other Amazon products. This is vital because all your purchased Kindle books are tied to this specific account. If you don’t have an Amazon account, you’ll be given the option to create one at this stage. It’s a straightforward process that usually involves providing your name, email, and creating a password. Once successfully registered, your Kindle will be linked to your digital library, allowing you to access all your previously purchased content and buy new books directly from the device. You’ll typically see a message confirming the registration, and the home screen will begin to populate with some introductory content or your existing library.
Navigating Your New Device: Interface and Settings
Now that your Kindle is connected and registered, it’s time to explore its interface and customize some essential settings to enhance your reading experience. The Kindle interface is designed to be intuitive and focused on reading, but understanding its various menus and options will unlock its full potential.
Understanding the Home Screen Layout
The home screen is your gateway to everything on your Kindle. While the exact layout might vary slightly depending on your specific model and firmware version, generally, you’ll find a few key elements. At the very top, you’ll see the status bar, which typically displays the time, Wi-Fi signal strength, and battery life. Below that, you often have a search bar, allowing you to quickly find books in your library or in the Kindle Store. The majority of the home screen is dedicated to displaying your library of books. This might be in a grid view (showing book covers) or a list view (showing titles and authors). You’ll usually see your most recently read books prominently displayed, making it easy to pick up where you left off. Below your library, you might find suggestions for new books from the Kindle Store, personalized recommendations based on your reading habits, or links to other Amazon services like Goodreads. Navigating the home screen is generally done by tapping or swiping. Swiping left or right will often take you between different sections of the home screen or allow you to browse more of your library. Tapping on a book cover will open that book.
Exploring the Settings Menu
The settings menu is where you’ll fine-tune your Kindle to your preferences. To access it, swipe down from the top of the screen (or tap the gear icon, depending on your model) to reveal the quick settings panel. From there, you’ll typically see a “All Settings” or “Settings” option. Tapping this will open the full settings menu.
Personalizing Your Reading Experience
Within the settings, you’ll find numerous options to tailor your reading experience. Under “Device Options” or “Reading Options,” you can adjust font sizes, line spacing, margins, and even select different fonts. Experiment with these settings to find what’s most comfortable for your eyes. You can also toggle features like “Page Refresh” (which forces a full screen refresh every few pages to prevent ghosting, though modern Kindles rarely need this) or “Dark Mode” (if available on your model) for reading in low light conditions. You might also find options to set a device password for security, which is highly recommended if you carry your Kindle frequently.
Managing Your Account and Content
The settings menu also allows you to manage your Amazon account and downloaded content. You can “Deregister Device” here if you ever wish to link your Kindle to a different Amazon account. Under “Your Account,” you can also manage your email address for sending documents to your Kindle. In the “Storage” section, you can see how much space your books are taking up and even delete unwanted titles to free up space. This is also where you’ll often find options for “Whispersync for Books” (to sync your reading progress across devices) and “Whispersync for Voice” (to switch seamlessly between reading and listening to Audible audiobooks). Ensuring these are enabled is crucial for a smooth cross-device experience.
Network and Device Maintenance
Other important settings include “Wi-Fi Networks,” where you can connect to new networks or forget old ones. “Device Info” provides details about your Kindle model, serial number, and firmware version, which can be useful for troubleshooting. Regularly checking for “Device Updates” is also important, as Amazon frequently releases software updates that improve performance, add new features, and fix bugs. Your Kindle will usually update automatically when connected to Wi-Fi, but you can manually check for updates here. Under “Accessibility,” you might find options for larger text, inverted colors, or screen readers, catering to various needs. Taking the time to explore these settings will ensure your Kindle is perfectly configured for your reading habits.
Acquiring and Organizing Your Library
With your Kindle set up and personalized, the next exciting step is to fill it with books! There are several ways to acquire content, and keeping your library organized will make it much easier to find what you want to read.
Purchasing Books from the Kindle Store
The most straightforward way to get books onto your Kindle is directly through the integrated Kindle Store. From your home screen, you’ll typically find an icon or a section dedicated to the Store. Tapping this will open a browser-like interface where you can browse books by genre, bestsellers, new releases, or use the search bar to find specific titles or authors. Once you find a book you’re interested in, you can tap on its cover to view the product page, read descriptions, customer reviews, and often download a free sample. To purchase, simply tap the “Buy now with 1-Click” button (assuming you have 1-Click purchasing enabled on your Amazon account). The book will automatically download to your Kindle over Wi-Fi and appear in your library. Purchased books are stored in your Amazon cloud, so even if you delete them from your device, you can always redownload them later. Keep an eye out for Kindle Daily Deals and other promotions, which can offer significant discounts on popular titles.
Sending Documents and Personal Files
Your Kindle isn’t just for Amazon-purchased books. You can also send personal documents, PDFs, web articles, and other files directly to your device.
Using Send to Kindle Email
Every Kindle is assigned a unique “Send to Kindle” email address. You can find this address in your Kindle’s settings under “Your Account” or on your Amazon account management page online. To send a document, simply attach it to an email and send it to your Kindle’s email address. Amazon will automatically convert many common file formats (like .doc, .docx, .html, .txt, .rtf, .jpeg, .gif, .png, .bmp, and .pdf) into a Kindle-friendly format and deliver it to your device via Wi-Fi. You can also send the original PDF if you prefer not to convert it, though the reading experience for unconverted PDFs can sometimes be less optimized. Ensure the email address you’re sending from is added to your “Approved Personal Document E-mail List” in your Amazon account settings to prevent spam. This is an incredibly useful feature for reading work documents, academic papers, or even long emails without straining your eyes on a computer screen.
Utilizing the Send to Kindle App or Browser Extension
Amazon also offers a “Send to Kindle” application for desktop computers (Windows and Mac) and browser extensions for Chrome and Firefox. These tools make it even easier to send files or web pages to your Kindle. With the desktop app, you can simply drag and drop files onto the application window, and they’ll be sent to your device. The browser extensions allow you to send an entire web page, or just the main article content, to your Kindle with a single click. This is fantastic for saving long articles from the internet to read later in a distraction-free environment. These methods are often faster and more convenient than emailing, especially for multiple files or frequently sending web content.
Organizing Your Library with Collections
As your library grows, it can become challenging to find specific books. Kindle’s “Collections” feature is your best friend for organization.
Creating and Managing Collections
From your Kindle’s home screen, you’ll usually see an option to view “Collections” (sometimes accessible through a menu or filter option). Tap on “Create New Collection.” Give your collection a descriptive name, such as “Fiction,” “Non-Fiction,” “To Read,” “Favorites,” or “Work Related.” Once created, you can add books to it. You can do this by long-pressing on a book cover in your library and selecting “Add to Collection,” or by navigating into a collection and adding books from there. Books can belong to multiple collections, so a book about historical fiction could be in both “History” and “Fiction.” This flexibility allows you to categorize your books in a way that makes sense to you. You can choose to view your library by “Collections” instead of “All” or “Downloaded,” which significantly cleans up your home screen and makes navigation much more efficient. Regularly creating and updating collections will save you time and frustration in the long run.
Filtering and Sorting Your Books
Beyond collections, your Kindle also offers various ways to filter and sort your library. On the home screen, look for options to sort by “Recent,” “Title,” “Author,” or “Publication Date.” You can also often filter to show only “Downloaded” books (those currently on your device) or “All” books (including those in your cloud). These filtering and sorting options, combined with collections, provide robust tools for managing even the largest of digital libraries, ensuring that your next great read is always just a few taps away.
When setting up your Kindle, it’s essential to consider how it can enhance your reading experience and productivity. For those looking to expand their digital presence, you might find it beneficial to explore how to effectively utilize WordPress for your business needs. This can complement your Kindle setup by providing a platform to share your reading insights and reviews. To learn more about this, check out the article on unleashing the power of WordPress websites for your business success.
Maximizing Your Reading Experience: Features and Tips
You’ve set up your Kindle, connected it, and started building your library. Now, let’s explore some of the features and best practices that will elevate your reading experience from good to absolutely fantastic.
Customizing Font and Display Settings
The beauty of an e-reader is the ability to personalize the text to suit your preferences, making reading more comfortable and enjoyable.
Adjusting Font Size and Typeface
While reading a book, tap the top of the screen to bring up the reading toolbar. You’ll usually see an “Aa” icon (often labeled “Font” or “Display”). Tapping this will open a menu where you can adjust the font size. There’s a slider or a series of options to make the text larger or smaller. Experiment to find the perfect size that allows you to read comfortably without straining your eyes or having to squint. This menu also typically offers a selection of fonts or typefaces. Kindle devices usually come with a few optimized fonts, such as Bookerly, Caecilia, or OpenDyslexic. Each has a slightly different character, and some readers find certain fonts easier to read than others. Don’t be afraid to try them all out. The goal is to find a combination that reduces eye fatigue and enhances readability for extended periods.
Managing Page Layout and Warmth Settings
Within the same “Aa” menu, you can often find options for page layout. This includes adjusting the line spacing, margins, and orientation (portrait or landscape). Tighter line spacing might fit more words on a page but can make reading feel cramped, while wider spacing can feel more airy but requires more page turns. Similarly, adjusting margins can affect how much text is displayed. Some Kindles, particularly the Paperwhite and Oasis models, also feature a “warmth” setting for the display light. This allows you to shift the screen’s color temperature from a cooler blue-white to a warmer amber tone, which can be less harsh on the eyes, especially when reading in the evening or before bed. Experimenting with these warmth levels can significantly improve your comfort during night-time reading sessions. Remember, there’s no single “correct” setting; it’s entirely about what feels best for you.
Leveraging Built-in Tools: Dictionary, X-Ray, and Notes
Kindles are more than just simple book displays; they come equipped with powerful tools that enrich your reading and understanding.
Instant Dictionary Lookups
Encounter an unfamiliar word while reading? Simply long-press on it. A dictionary definition will instantly pop up, often without interrupting your reading flow. This is incredibly useful for expanding your vocabulary and ensuring you fully grasp the text. The built-in dictionaries (often Oxford Dictionaries) are comprehensive and readily available offline. You can also change the default dictionary in your device’s settings if you have multiple ones installed. This feature eliminates the need to reach for a physical dictionary or another device, keeping you immersed in your book.
Exploring X-Ray for Deeper Insights
For many books, especially longer novels or non-fiction works, Kindle’s “X-Ray” feature provides incredible depth. To access X-Ray, tap the top of the screen to bring up the toolbar, then look for the X-Ray icon (often an “X” within a circle). X-Ray provides a quick overview of “People,” “Terms,” and “Topics” mentioned throughout the book. You can see how often a character appears, read short descriptions of historical figures, or trace the development of a specific theme. It’s a fantastic way to quickly refresh your memory about characters you might have forgotten or to gain a better understanding of complex concepts without leaving the current page. X-Ray data is usually downloaded when you first open a book that supports it.
Highlighting and Note-Taking
Just like with a physical book, you can highlight passages and add notes on your Kindle. To highlight, long-press on a word and then drag your finger to select the desired text. A toolbar will appear with options to highlight in different colors (though the Kindle screen is monochrome, the highlights are tracked internally), add a note, or share the passage. To add a note, simply tap “Note” after highlighting, and a small keyboard will appear, allowing you to type your thoughts. All your highlights and notes are saved and can be easily accessed. You can usually find them by going to the “Notebook” section from the reading toolbar, or by logging into your Amazon account online and navigating to “Your Content and Devices,” where they are often visible and exportable. This feature is invaluable for students, researchers, or anyone who likes to engage deeply with the text.
Optimizing Battery Life and Maintenance
To ensure your Kindle is always ready when you are, understanding how to optimize its battery life and perform basic maintenance is key.
Tips for Extending Battery Life
While Kindles are known for their impressive battery life (often weeks on a single charge), a few habits can help you get the most out of it. The primary battery drain culprits are Wi-Fi and the screen light. When you’re not actively downloading books or syncing, consider turning Wi-Fi off. You can quickly do this from the quick settings panel by swiping down from the top of the screen. Similarly, keep the screen light at the lowest comfortable setting. You don’t need maximum brightness in a well-lit room. Placing your Kindle in “Airplane Mode” (which turns off Wi-Fi and other wireless radios) when you know you won’t need connectivity for a while is another excellent way to conserve power. Regularly charging your Kindle before it completely dies (around 20-30% remaining) can also contribute to the long-term health of the battery, though modern lithium-ion batteries are quite resilient.
Cleaning and Protecting Your Device
Keeping your Kindle clean and protected will ensure its longevity and a pleasant reading experience. For cleaning the screen, use a soft, lint-free cloth (like a microfiber cloth) and gently wipe away smudges and fingerprints. Avoid harsh chemicals or abrasive materials, as these can damage the e-ink display. If there’s stubborn dirt, a slightly dampened cloth (with plain water only) can be used, but ensure the screen is completely dry before turning it on or plugging it in. To protect your Kindle from scratches, drops, and general wear and tear, investing in a good quality case is highly recommended. Many cases offer automatic wake/sleep functionality when you open or close them, which is a convenient feature. A screen protector can also add an extra layer of defense against scratches. Treating your Kindle with care will keep it looking and functioning like new for many years of reading enjoyment.
P.S. Enjoyed this? Become an insider and I'll send you one of my favourite posts every couple of weeks.