Embracing the Art of Lino Printing at Your Fingertips
So, you’ve been captivated by the bold lines and unique textures of lino printing, and now you’re itching to try it yourself. Good for you! This ancient art form, popularized by artists like Picasso, is remarkably accessible and rewarding, even if you’re a complete beginner. You don’t need a fancy studio or a hefty budget to get started; with a few essential tools and a dash of creativity, you can transform your kitchen table into a vibrant printmaking hub. This guide will walk you through every step of the process, from gathering your initial supplies to pulling your very first impressive print. Get ready to unleash your inner artist and discover the satisfying craft of lino printing right in your own home.
The Allure of Linocut
Before we dive into the nitty-gritty, let’s briefly touch upon why lino printing is such a fantastic medium to explore. For starters, it’s a “relief” printing technique, meaning you carve away the areas you don’t want to print, leaving the raised parts to hold the ink. This reductive process can be incredibly meditative and offers a unique way to think about positive and negative space. Unlike some other art forms that require extensive training in perspective or anatomy, lino printing is more forgiving and encourages a graphic, stylized approach that is visually appealing to almost everyone. The supplies are relatively inexpensive, and the learning curve is gentle enough that you’ll be creating impressive works in no time. Plus, the sheer joy of pulling back the paper to reveal your printed design is a sensation that never gets old. It’s a tangible, hands-on experience that offers a welcome break from digital screens and an opportunity to create something truly unique with your own hands.
If you’re interested in exploring creative hobbies like lino printing at home, you might also find value in understanding the broader context of remote work and its impact on personal projects. An insightful article titled “Exploring the Benefits and Drawbacks of Remote Work in 2024” discusses how the shift to remote work can influence our leisure activities and creative pursuits. You can read it here: Exploring the Benefits and Drawbacks of Remote Work in 2024.
Gathering Your Essential Toolkit
Before you can carve your masterpiece, you’ll need to assemble a basic set of supplies. Don’t feel pressured to buy the most expensive professional-grade equipment right away. Starting with entry-level tools is perfectly fine, and you can always upgrade later as your skills and passion grow. Think of this initial investment as your ticket to a new creative adventure.
Choosing Your Lino Blocks
The star of the show, of course, is the linoleum block itself. You have a few options here:
- Traditional Grey Lino: This is the classic choice. It’s firm, durable, and offers a smooth surface for carving. It can be a little stiff when cold, so you might want to gently warm it up (perhaps on a radiator or with a hairdryer on low) to make it easier to carve.
- Soft Cut Lino (or Easy Carve): As the name suggests, this material is much softer and easier to carve than traditional lino. It’s an excellent option for beginners, as it requires less pressure and is less likely to cause hand fatigue. However, it can also be more prone to accidental nicks and dents.
- Rubber Blocks: Similar to soft cut lino, rubber blocks are incredibly easy to carve and are very durable. They are often used for stamping and can be a good option for small, intricate designs.
- Vinyl Tiles: You can even experiment with readily available vinyl floor tiles from a hardware store. While not specifically designed for lino printing, they can be surprisingly effective and are very budget-friendly for practice pieces.
Start with a small block, perhaps 4×6 inches or 5×7 inches, to get a feel for the material and carving process without committing to a large, intricate design.
Selecting Your Carving Tools
Your carving tools are an extension of your hand, so choosing a comfortable and effective set is crucial. Most starter sets include a handle and an assortment of interchangeable nibs (also called cutters or gouges).
- V-Gouges: These create thin lines and are excellent for outlines and fine details. You’ll typically find a small and a larger V-gouges in a set.
- U-Gouges (or Round Gouges): These create wider channels and are ideal for clearing larger areas of lino. Again, you’ll usually find various sizes.
- Knife Blade: Some sets include a small knife blade, useful for cutting sections of lino or making very sharp, precise cuts.
When you’re carving, always cut away from yourself to prevent accidental slips and injuries. Keep your non-carving hand behind the cutting edge, never in front.
Inks for Lino Printing
The ink you choose will significantly impact the look and feel of your prints.
- Water-Based Inks: These are highly recommended for beginners. They are easy to clean up with soap and water, dry relatively quickly, and come in a wide range of vibrant colors. Their drying time can vary, so be mindful of smudging if you’re working on multiple prints quickly.
- Oil-Based Inks: These offer a richer, more professional finish and typically have a longer working time, which can be beneficial for complex projects. However, they require mineral spirits or a dedicated ink cleaner for cleanup, which can be messier and less environmentally friendly for home use.
- Fabric Inks: If you plan to print on fabric like t-shirts or tote bags, you’ll need special fabric printing inks. These are usually water-based but contain binders that allow them to cure and become permanent after heat-setting.
Regardless of the type, choose inks specifically formulated for relief printing. Acrylic paints are generally too thin and don’t have the tackiness needed for good ink transfer.
Paper Choices
Almost any paper can be used for lino printing, but some will yield better results than others.
- Smooth Papers: These are ideal for capturing fine details. Look for papers with a slight absorbency but not too much texture.
- Drawing Paper/Cartridge Paper: A good starting point for practice prints. Choose a weight of at least 80gsm (grams per square meter) to prevent bleed-through.
- Printmaking Paper: Specifically designed for printmaking, these papers are often acid-free, durable, and have an excellent surface for ink transfer. Brands like Stonehenge, Somerset, or Japanese Masa paper are popular choices.
- Cardstock: Thicker cardstock can create a bolder, more substantial print.
Experiment with different papers to see how they interact with your ink and carving style.
Rollers and Brayers
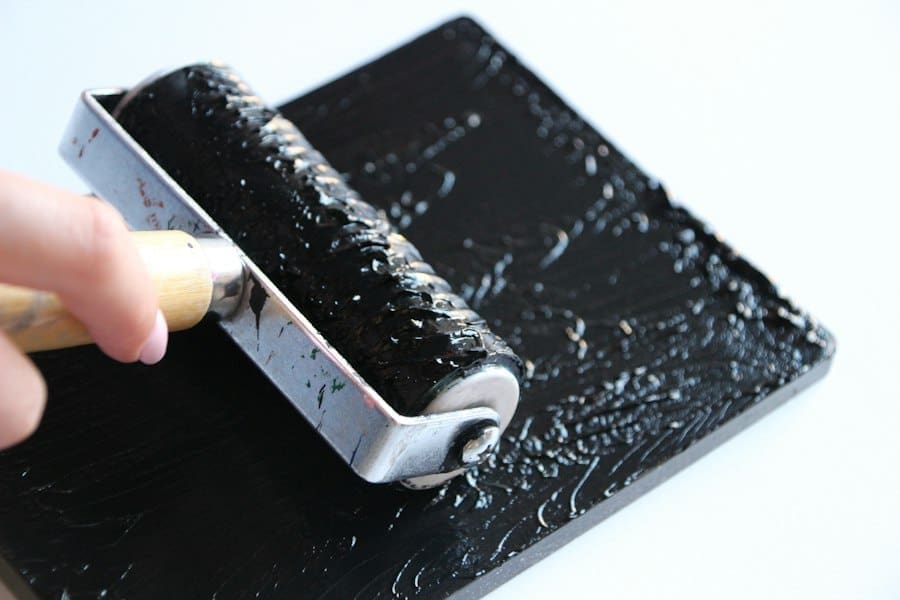
A brayer is essential for applying an even layer of ink to your carved block.
- Soft Rubber Brayer: This is the most common and versatile type. The soft rubber surface picks up and distributes ink smoothly. Choose a brayer that is slightly wider than your largest linocut block to ensure full coverage.
- Hard Rubber Brayer: These are firmer and can be good for very detailed blocks, but they might not pick up ink as easily on textured surfaces.
Other Handy Supplies
- Bench Hook or Non-Slip Mat: Crucial for holding your lino block securely in place while carving, preventing slips and potential injuries.
- Tracing Paper/Parchment Paper: For transferring your design onto the lino.
- Pencils (HB, 2B): For drawing your design.
- Eraser: For correcting drawing mistakes.
- Sharpie or Permanent Marker: For darkening your transferred design on the lino.
- Glass Slab, Plexiglass, or Ceramic Tile: A non-porous surface for rolling out your ink.
- Palette Knife or Old Spoon: For scooping ink onto your rolling surface.
- Cleaning Supplies: Rags or paper towels, dish soap, and water (for water-based inks) or mineral spirits/ink cleaner (for oil-based inks).
- Spoon or Baren: For burnishing (rubbing) the back of your paper to transfer the ink. A wooden spoon works surprisingly well! You can also purchase a dedicated baren, which is a smooth, handheld tool for even pressure.
Designing Your Linocut Masterpiece
Now that you have your tools ready, it’s time to unleash your creativity and design the image you’ll carve. This is a crucial step, as the success of your print often starts with a well-thought-out design.
Brainstorming and Sketching Ideas
Don’t jump straight into intricate details. Start with broad concepts. What inspires you? Nature, animals, abstract shapes, typography, everyday objects?
- Simplicity is Key: For your first few prints, lean towards simpler designs with clear, distinct shapes. Complex details can be challenging to carve for beginners. Think about high contrast – areas that will be black versus areas that will be white.
- Think in Reverse: This is perhaps the most critical concept in lino printing. Whatever you carve away will be the color of your paper (or white), and whatever you leave raised will be inked and print. It’s a reductive process. If you want white lines on a black background, you’ll carve away the lines. If you want a black outline, you’ll leave the outline raised.
- Consider Mirror Image: If your design includes text or specific directional elements (like a face looking left), you’ll need to draw it as a mirror image on your lino block. When printed, it will appear correctly. For purely abstract or symmetrical designs, this isn’t as critical.
Spend some time sketching different ideas in your sketchbook. Don’t be afraid to make mistakes; that’s what sketchbooks are for!
Transferring Your Design to the Block
Once you have a design you’re happy with, it’s time to transfer it onto your lino block.
- Pencil Transfer Method (Simplest):
- Draw your design clearly and boldly on a piece of tracing paper or thin drawing paper. If it includes text or directional elements, remember to draw it in reverse.
- Flip the paper over onto your lino block.
- Using a pencil (a 2B or softer works well), firmly rub the back of your drawing. The pencil lines will transfer onto the lino.
- Carefully lift the paper to check the transfer. If parts are faint, place the paper back down and rub again.
- Once transferred, go over the transferred lines on the lino block with a permanent marker (like a Sharpie) to make them clearer and less likely to smudge during carving. This step is incredibly helpful for maintaining your design as you carve.
- Carbon Paper Method: You can also use carbon paper. Place the carbon paper face down on the lino, then your drawing on top. Trace over your drawing with a pen or pencil.
- Direct Drawing: For very simple designs or if you feel confident, you can draw directly onto the lino block with a pencil or permanent marker. Remember, if you use a marker, it will be permanent!
Double-check your design on the block, especially for reversed text or directional elements, before you start carving. There’s no undo button once you’ve made a cut!
The Carving Process: Bringing Your Design to Life
This is where the magic begins! Carving can be a meditative and satisfying experience, but it requires patience and a steady hand. Remember the safety first rule: always carve away from yourself.
Securing Your Block
Before making any cuts, secure your lino block. This is paramount for safety and precision.
- Bench Hook: A bench hook is a fantastic tool for this. It has a lip that hooks over the edge of your workbench or table, and another lip that holds your lino block firmly against it.
- Non-Slip Mat: If you don’t have a bench hook, place your lino block on a non-slip mat (like a piece of Dycem or even a yoga mat scrap) to prevent it from sliding around.
- Clamp (Optional): For larger blocks, you might even consider clamping the block to your work surface.
Never hold the lino block in one hand and carve with the other without securing it first.
Mastering Your Carving Tools
Each gouge has a specific purpose. Practice on a scrap piece of lino before tackling your main design.
- Holding the Tool: Hold the carving tool like a pen or pencil, but with your forefinger often extended down the shaft of the tool to guide it and apply controlled pressure.
- Angle of Attack: Hold the tool at a shallow angle to the lino surface, not straight down. This helps you ‘scoop’ out the lino rather than digging in too deeply.
- V-Gouges for Outlines and Details: Start by carefully carving the outlines of your design using a small V-gouge. These initial cuts define the edges of the areas that will be printed. Take your time, making smooth, continuous cuts where possible. Think of it as drawing with the tool.
- U-Gouges for Clearing Areas: Once your outlines are established, use a U-gouge to remove the larger areas you want to remain unprinted (white). Use a scooping motion, working from the outside of the area towards the center. Be careful not to accidentally cut into the raised lines you want to keep. You can use different sizes of U-gouges to clear larger or smaller areas.
- Varying Pressure: Experiment with how much pressure you apply. Light pressure will give you shallow cuts, while more pressure will create deeper channels. For beginners, it’s often better to make several shallow passes rather than trying to make one deep cut, as this gives you more control.
- Cleaning Your Tools: Lino bits can get stuck in your gouges. Periodically clear them out with your fingers or a small brush to ensure clean cuts.
- Rotating the Block: Instead of twisting your wrist or body into awkward positions, rotate your lino block as you carve to maintain a comfortable and controlled carving angle.
Common Carving Challenges and Tips
- Slipping: If your tool slips, it’s often because you’re applying too much pressure or carving at too steep an angle. Slow down and adjust your grip and angle.
- Unwanted Nicks: These happen to everyone. Sometimes they add character! For small nicks in raised areas, you might be able to carefully trim them with a very sharp V-gouge or a craft knife. For larger mistakes, you might need to embrace them as part of the unique handmade charm.
- Hand Fatigue: Take breaks! Lino carving can be hard on your hands. Stretch your fingers and wrists regularly.
- “Ghost” Lines: These are faint lines left by your carving tool when clearing larger areas. They might pick up a little ink and show up as faint texture in your print. If you want a completely clean white area, you need to carve deeper or clear more thoroughly. Sometimes these ghost lines add a lovely texture, so it’s a matter of preference.
Remember, carving is a process of refinement. You might find yourself going back over areas to clean them up or deepen cuts. Take your time, enjoy the process, and don’t be afraid to experiment.
If you’re interested in exploring the world of printmaking, you might find it helpful to read a related article on essential tools for lino printing at home. This resource provides an overview of the materials you’ll need to get started and tips for creating your own unique designs. For more information, check out this helpful guide on essential tools for lino printing.
The Printing Process: Pulling Your First Print
This is the moment of truth! Inking your block and pulling a print is incredibly exciting. It’s where all your careful carving comes to fruition.
Preparing Your Ink Station
Before you ink your block, get everything ready to go. You want a smooth, uninterrupted flow once the ink is out.
- Clean Surface: Ensure your ink rolling surface (glass, plexiglass, or tile) is perfectly clean and free of dust or debris.
- Ink Placement: Squeeze a small amount of ink onto one end of your rolling surface. Start with a pea-sized amount; you can always add more. Too much ink is harder to manage than too little.
- Brayer Ready: Have your brayer easily accessible.
- Paper Stack: Stack your printing paper neatly beside your work area.
- Burnishing Tool: Have your spoon or baren ready.
- Cleaning Supplies: Keep your rags and cleaning solution nearby for immediate cleanup.
Inking Your Block
The goal is to get a thin, even layer of ink on all the raised parts of your lino block.
- Roll Out the Ink: Take your brayer and roll it back and forth over the ink on your slab. You’ll hear a characteristic “tacky” sound as the ink begins to spread. Roll until the brayer has a smooth, consistent layer of ink on its surface, almost like velvet. If the ink looks streaky or uneven, keep rolling it out.
- Apply to the Block: Gently roll the inked brayer over your carved lino block. Roll in different directions (north-south, east-west, diagonally) to ensure all the raised surfaces are coated.
- Check for Coverage: Lift the brayer and inspect your block. You want to see an even, slightly glossy layer of ink on all the raised areas. If parts look too thick, carefully dab some off with a clean corner of your brayer or a piece of paper. If parts are missed, re-ink your brayer and roll again.
- “Kissing” the Block: The amount of ink is crucial. Too little ink will result in a faint, patchy print. Too much ink will fill in your carved details and make your print blurry or muddy. You want just enough ink so that the brayer “kisses” the surface of the raised areas without forcing ink down into the carved channels. This often takes a few practice runs to get right.
Printing Your Image
Once your block is perfectly inked, it’s time to make a print!
- Placement: Carefully lay a sheet of your chosen paper over the inked lino block. Try to place it as squarely and evenly as possible. You only get one shot once the paper touches the ink, as shifting it will cause smudging.
- Applying Pressure (Burnishing):
- Spoon Method: Take your wooden spoon and, using the back of the bowl, firmly and evenly rub the entire back surface of the paper. Work from the center outwards, ensuring you apply consistent pressure to every part of the design. You can often see the design start to show through the back of thinner papers. Pay extra attention to corners and edges.
- Baren Method: If you have a baren, use it in a circular motion with firm pressure across the entire paper surface.
- Resist the Urge to Peek: It’s tempting to lift the paper to check, but this will almost certainly result in a blurry or smudged print. Be patient and trust the process.
- The Reveal: Once you feel confident you’ve applied even pressure everywhere, carefully peel the paper off the lino block from one corner. Lift slowly and steadily to reveal your print!
Troubleshooting Common Printing Issues
- Patchy/Faint Print: Not enough ink, or not enough pressure during burnishing. Re-ink and apply more pressure.
- Muddy/Blurry Print: Too much ink, or ink bleeding into carved areas. Use less ink, ensure your brayer is evenly coated, and make sure your carving is deep enough to prevent ink transfer.
- Uneven Pressure: Parts of your print are clear, others are faint. Focus on applying consistent, even pressure across the entire block during burnishing.
- Smudges: Paper shifted during printing, or you touched the inked surface. Practice careful placement and avoid touching the inked areas.
- Lino Block Sticking to Paper: The ink might be too wet or sticky, or your paper might be too absorbent. Try less ink or a different paper.
Don’t be disheartened if your first few prints aren’t perfect. Lino printing, like any art form, involves practice and experimentation. Each “mistake” is a learning opportunity. Keep a notebook to jot down observations about ink consistency, pressure, and paper types.
If you’re interested in exploring the art of lino printing at home, you might also find it beneficial to read about how to enhance your online presence through effective website management. A related article discusses the importance of leveraging digital platforms for business success, which can be particularly useful for artists looking to showcase their work. You can check it out here to gain insights on creating a professional website that complements your creative endeavors.
Expanding Your Lino Printing Horizons
Once you’ve mastered the basics and are consistently pulling satisfactory single-color prints, you might be ready to explore more advanced techniques. Lino printing offers a surprising depth of creative possibilities!
Exploring Different Papers and Fabrics
Don’t limit yourself to just white paper. Experiment with:
- Colored Paper: Printing a dark ink on a light-colored paper, or a metallic ink on a dark paper, can create stunning effects.
- Handmade Paper: The texture of handmade paper can add another dimension to your prints.
- Newsprint: Excellent for quick test prints or to create a raw, industrial aesthetic.
- Fabric Printing: As mentioned earlier, dedicated fabric inks can transform plain tote bags, t-shirts, tea towels, or even canvas shoes into personalized wearable art. Ensure you follow the specific heat-setting instructions for your chosen fabric ink to make it permanent.
Multi-Color Prints
Printing with more than one color adds complexity and vibrancy to your work.
- Reduction Printing (Suicide Print): This is a bold and irreversible technique. You carve a single block, print a light color, then carve more from the same block, then print a darker color on top of the first prints. You continue this process, reducing the block further with each color layer. This method is challenging because you destroy parts of your block as you go, so you can’t go back! It requires careful planning and registration.
- Key Block and Color Blocks: For this method, you carve a “key block” which usually contains your main outlines or darkest elements. Then, you carve separate blocks for each additional color. You’ll need a system for “registration” – ensuring that each color block prints in exactly the same position on the paper to align perfectly with the other colors. Simple registration jigs can be made with cardboard or by marking the paper’s corners on your printing surface.
- Rainbow Rolls (Viscosity Printing): This involves applying multiple colors of ink side-by-side on your inking slab and rolling them onto the block simultaneously, creating a beautiful gradient effect.
Experimenting with Printing Techniques
Beyond the traditional spoon or baren, there are other ways to transfer ink:
- Pressing with Your Foot: For larger blocks, you can carefully place your paper, cover it with a clean sheet of newspaper or fabric, and then literally step on it to apply pressure! Ensure your weight is distributed evenly.
- Bags of Rice/Sand: A cloth bag filled with rice or sand can be a flexible and heavy burnishing tool, conforming to the block’s surface.
- Roller Press (Advanced): If you get serious about printmaking, you might eventually invest in a small tabletop roller press. These apply very even, consistent pressure for professional-quality prints.
Developing Your Style
As you gain experience, you’ll naturally develop your own artistic style.
- Line Work: Experiment with different types of lines – thick, thin, jagged, smooth. How do they convey mood or texture?
- Texture: Can you carve textures into your unprinted areas to create interesting backgrounds? What about carving cross-hatching or stippling to create tonal variations?
- Composition: Think about how you arrange elements within your design. Where do you place your focal point? How do you use negative space?
- Beyond Flat Prints: Consider using your linocuts for cards, book covers, labels, or even creating your own custom stationery.
Lino printing is a journey of discovery. Embrace the learning process, celebrate your successes, and don’t be afraid to make mistakes – they often lead to unexpected and beautiful results. With patience and practice, you’ll soon be creating a collection of unique, hand-printed art that you can proudly display or share. Welcome to the vibrant world of printmaking!
P.S. Enjoyed this? Become an insider and I'll send you one of my favourite posts every couple of weeks.