Understanding the Importance of a Newsletter
Building an email list is arguably one of the most effective strategies for long-term audience engagement and business growth. When you integrate a newsletter signup into your WordPress website, you’re not just collecting email addresses; you’re cultivating a direct line of communication with your most interested visitors. Unlike social media algorithms that can change on a whim, your email list remains yours, a proprietary asset that allows you to directly reach your audience with updates, promotions, and valuable content.
Think of your website as your storefront. Visitors come and go, browsing your products or content. A newsletter signup form acts as a way to capture their interest and invite them to become part of your inner circle. It’s an opportunity to convert casual browsers into loyal readers, potential customers, or even brand advocates. You can inform them about new blog posts, announce product launches, share exclusive discounts, or simply provide valuable insights that keep them coming back for more. This direct connection fosters trust and builds a deeper relationship, which is invaluable in today’s crowded digital landscape. Without a newsletter, you’re largely reliant on users remembering to return to your site or finding you again through search engines or social media – strategies that are inherently less reliable than a direct email.
If you’re looking to enhance your WordPress site further, you might find it beneficial to explore the article on how to optimize your online shop for better sales. This resource provides valuable insights into improving user experience and increasing conversions, which can complement your newsletter strategy. For more information, check out the article here: Optimize Your Online Shop.
Choosing Your Email Marketing Service
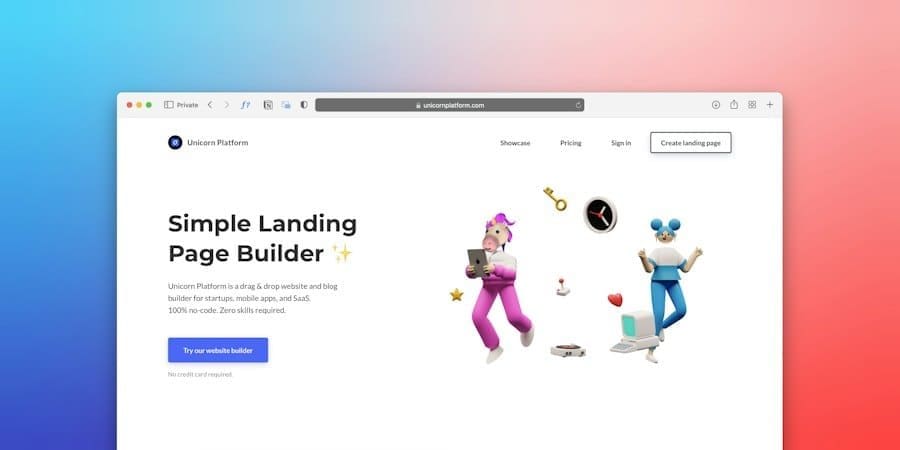
Before you can even think about adding a signup form to your WordPress site, you need to decide which email marketing service you’ll use to manage your list, send emails, and track your campaigns. This is a crucial first step, as your choice will dictate many of the subsequent integration steps. There are numerous options available, ranging from free basic services to powerful, feature-rich platforms. Your decision should be based on your budget, the size of your anticipated list, and the features you require.
Exploring Popular Email Marketing Platforms
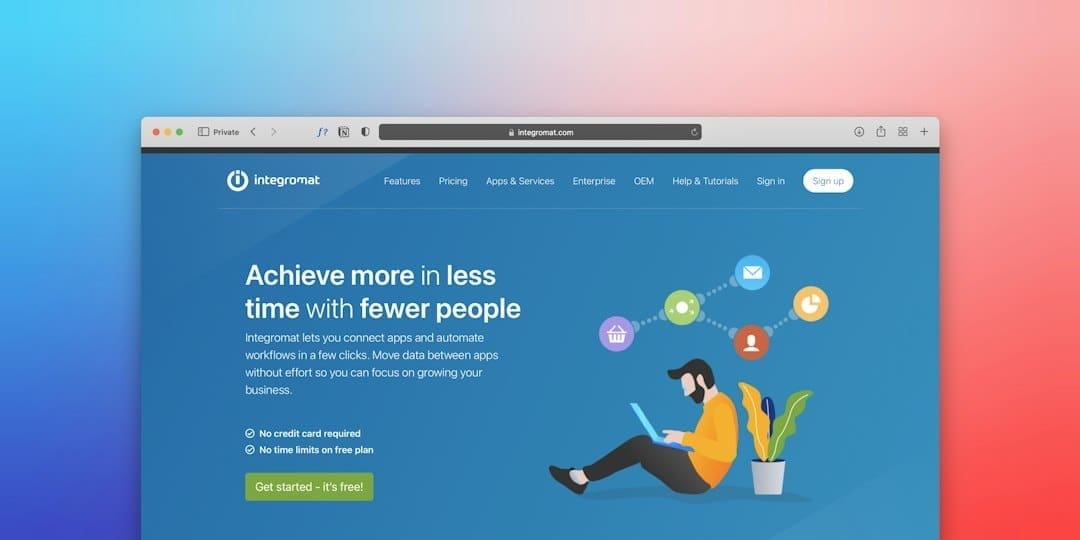
- Mailchimp: Often a go-to for beginners, Mailchimp offers a generous free plan for up to 500 contacts and 2,500 sends per month (or 1,000 contacts and 4,000 sends per month on the free plan as of recent updates). Its drag-and-drop email builder is intuitive, and it integrates seamlessly with many WordPress plugins. It’s excellent for getting started and understanding the basics of email marketing.
- ConvertKit: Specifically designed for creators, bloggers, and online educators, ConvertKit focuses on automation, segmenting, and audience engagement. While it has a slightly steeper learning curve than Mailchimp for absolute beginners, its powerful features for tagging subscribers and delivering targeted content make it a favorite among those who prioritize thoughtful audience segmentation. They offer a free plan for up to 1,000 subscribers, but with limited features compared to paid plans.
- Constant Contact: Known for its excellent customer support and user-friendly interface, Constant Contact is another solid choice, particularly for small businesses and non-profits. They offer a wide range of templates and tools for events and social media integration. They typically offer a free trial period, not a perpetual free plan.
- MailerLite: A rising star in the email marketing world, MailerLite provides a powerful and affordable solution with a focus on ease of use. Their free plan supports up to 1,000 subscribers and 12,000 emails per month, including features like landing pages and advanced segmentation. It’s a great option for those looking for more features than Mailchimp’s free tier without a significant jump in complexity.
- ActiveCampaign: While more expensive and feature-rich, ActiveCampaign is ideal for businesses looking for advanced marketing automation, CRM capabilities, and deep analytics. It’s geared towards more complex sales funnels and personalized customer journeys. Not typically a starting point for most WordPress users just looking for a simple newsletter signup.
Key Features to Consider
When evaluating these services, keep the following in mind:
- Pricing Structure: Understand the cost associated with your expected subscriber count and sending volume. Most services scale their pricing based on these metrics.
- Ease of Use: How intuitive is the platform? Can you easily create emails and manage your list without extensive technical knowledge?
- Automation Capabilities: Can you set up automated welcome sequences for new subscribers or drip campaigns for specific content?
- Segmentation: Can you categorize your subscribers based on their interests or actions, allowing for more targeted communication?
- WordPress Integration: How well does the service integrate with WordPress? Are there dedicated plugins or easy embed options?
- Analytics and Reporting: What kind of data does the service provide about your email campaigns? Open rates, click-through rates, unsubscribes – these are crucial for optimizing your efforts.
Once you’ve selected your email marketing service, sign up for an account. You’ll typically need to verify your email address and sometimes your website domain to prevent spam. Take some time to familiarize yourself with the dashboard and create your first list or audience where your new subscribers will be stored. This preparation is essential before moving on to integrating the signup form itself.
Implementing the Signup Form with a Plugin

For most WordPress users, the easiest and most recommended method for adding a newsletter signup form is by using a dedicated plugin. These plugins bridge the gap between your WordPress site and your chosen email marketing service, handling the technical details of data transfer and form display.
Installing and Activating a Plugin
- Navigate to your WordPress Dashboard: Log in to your WordPress admin area.
- Go to Plugins > Add New: In the left-hand sidebar, hover over “Plugins” and click “Add New.”
- Search for your Service’s Plugin: In the search bar on the right, type the name of your email marketing service (e.g., “Mailchimp for WordPress,” “ConvertKit,” “MailerLite”). Most popular services have an official or highly recommended third-party plugin. Alternatively, you can search for general form builder plugins like “WPForms” or “Fluent Forms” if you prefer more control over your form’s design and features, and they often have add-ons for email marketing integrations.
- Install the Plugin: Once you find the correct plugin, click the “Install Now” button.
- Activate the Plugin: After installation, click the “Activate” button. The plugin will now be active on your site.
Configuring the Plugin
After activation, you’ll typically find a new menu item in your WordPress dashboard, often under “Settings,” or its own dedicated menu entry (e.g., “Mailchimp,” “ConvertKit”). Click on this to access the plugin’s settings.
- Connect to Your Email Marketing Service: This is the most critical step. The plugin will usually ask for an API Key from your email marketing service.
- Finding your API Key: Log in to your email marketing service’s dashboard. Look for “Account,” “Profile,” “Integrations,” or “API” settings. For example, in Mailchimp, you’d go to Account > Extras > API Keys. In ConvertKit, it’s typically under your profile settings. Copy this API key.
- Pasting the API Key: Paste the copied API key into the designated field in your WordPress plugin’s settings and save the changes. The plugin should then establish a connection with your email service.
- Select Your Audience/List: Once connected, the plugin will usually pull in the lists or audiences you’ve created in your email marketing service. You’ll need to select which list new subscribers from this form should be added to.
- Customize Form Fields: Most plugins allow you to customize the fields on your signup form. At a minimum, you’ll need an email address field. You might also want to add fields for first name, last name, or other demographic information, but remember that more fields can decrease conversion rates. Keep it simple initially.
- Design and Styling: Plugins often provide options to style your form to match your website’s aesthetics. You can usually adjust colors, fonts, button text, and success/error messages. Some plugins might require basic CSS knowledge for advanced styling, but many offer visual editors.
- Double Opt-in Settings: Decide whether you want to enable double opt-in. This means subscribers receive a confirmation email they must click before being added to your list. While it adds an extra step, it significantly improves list quality by ensuring subscribers are genuinely interested and that their email addresses are valid. It also helps with GDPR compliance.
- Success and Error Messages: Customize the messages users see after submitting the form successfully or if an error occurs. A clear success message encourages trust, while a helpful error message guides users to resolve issues.
Displaying Your Signup Form Effectively
Once your plugin is configured and connected, the next step is to display the form on your WordPress website in a way that maximizes visibility and encourages sign-ups without being intrusive. There are several strategic locations and methods you can employ.
Embedding the Form in Posts and Pages
This is a fundamental way to display your form.
- Using a Block Editor (Gutenberg): If you’re using the default WordPress block editor, most newsletter plugins will add their own dedicated block.
- When editing a post or page, click the “+” icon to add a new block.
- Search for your plugin’s name (e.g., “Mailchimp Form,” “ConvertKit Form”).
- Select the block, and it will typically display a dropdown to choose the form you’ve created and configured in the plugin’s settings.
- Place this block strategically within your content, perhaps at the end of a relevant blog post, on your “About Us” page, or a dedicated “Subscribe” page.
- Using a Classic Editor or Shortcode: If you’re still using the classic editor or if your plugin doesn’t offer a block, it will almost certainly provide a shortcode.
- Locate the shortcode in your plugin’s settings (it might look something like
[mc4wp_form id="123"]or[convertkit form="12345"]). - Copy this shortcode.
- Paste it directly into the text editor of your post or page where you want the form to appear. WordPress will automatically render the form when the page is viewed.
Utilizing Widgets in Sidebars and Footers
Widgets are excellent for displaying your form in consistent, prominent locations across your site.
- Navigate to Appearance > Widgets: In your WordPress dashboard, go to “Appearance” and then “Widgets.”
- Find Your Form Widget: Your newsletter plugin will usually add a custom widget. It will be named something like “Mailchimp Form Widget,” “ConvertKit Form,” or similar.
- Drag and Drop: Drag this widget to the desired widget area (e.g., “Sidebar,” “Footer Column 1,” etc.). The available widget areas depend on your WordPress theme.
- Configure Widget Settings: Once dropped, click on the widget to expand its settings. You’ll typically be able to select which form to display, add a title for the widget (e.g., “Subscribe to Our Newsletter”), and sometimes add a short descriptive text. Save the widget.
Creating Dedicated Landing Pages
A dedicated landing page is a standalone page focused solely on getting visitors to subscribe. This is especially effective if you’re running ad campaigns or specific promotions.
- Create a New Page: Go to Pages > Add New in WordPress.
- Design for Conversion:
- Write compelling copy that highlights the benefits of subscribing. What value will subscribers receive?
- Use clear and concise language.
- Embed your newsletter signup form prominently on this page, often near the top.
- Consider removing distracting elements like navigation menus or sidebars to keep the user focused on the call to action.
- Use a Landing Page Builder (Optional): Plugins like Elementor, Beaver Builder, or SeedProd offer drag-and-drop interfaces specifically designed for creating high-converting landing pages, often with built-in modules for newsletter forms.
Implementing Pop-up or Slide-in Forms
Pop-ups and slide-ins are highly effective for capturing attention, but they must be used judiciously to avoid annoying visitors. Many newsletter plugins offer pop-up functionality, or you can use specialized pop-up plugins like OptinMonster, Bloom (from Elegant Themes), or ConvertPro.
- Choose Your Pop-up Trigger:
- Time-based: Appears after a certain number of seconds on the page.
- Scroll-based: Appears after the user scrolls a certain percentage down the page.
- Exit-intent: Appears when the user’s mouse movement suggests they are about to leave the site. This is often the least intrusive and most effective.
- Click-triggered: Appears when a user clicks a specific button or link.
- Design Your Pop-up: Make it visually appealing and ensure the call to action is clear.
- Frequency and Delay: Don’t show the pop-up too frequently to the same visitor. Set delays and limits to prevent oversaturation. A common best practice is to show it once per session or once every few days.
- Mobile Responsiveness: Ensure your pop-ups are responsive and don’t obscure content on mobile devices. Google penalizes intrusive interstitials on mobile.
By strategically placing your signup forms, you maximize your chances of converting visitors into valuable newsletter subscribers, directly impacting your ability to communicate and grow your audience.
If you’re looking to enhance your WordPress site further, you might find it beneficial to explore strategies for engaging your audience more effectively. A great resource on this topic is an article that discusses the experience of conquering Nephin, which highlights the importance of connecting with your audience through storytelling. You can read more about it here. This approach can complement your newsletter signup efforts by providing valuable content that keeps your visitors coming back for more.
Optimizing and Testing Your Newsletter Signup
Adding the form is only the first step. To truly harness the power of your newsletter, you need to continuously optimize its performance and test different approaches. This iterative process ensures you’re maximizing your conversion rates and building a high-quality email list.
A/B Testing Form Elements
A/B testing, also known as split testing, involves creating two versions of something (A and B) and showing them to different segments of your audience to see which performs better. For newsletter signups, you can A/B test various elements:
- Headlines and Call-to-Action (CTA) Text: Does “Subscribe to Our Newsletter” perform better than “Get Exclusive Updates” or “Join Our Community”? Does “Sign Me Up!” convert better than “Subscribe Now”?
- Form Field Quantity: Does collecting just an email address yield more sign-ups than asking for both email and first name? While more data can be useful, fewer fields generally mean higher conversion.
- Form Design and Color: Does a different background color, button color, or font choice impact sign-up rates?
- Placement: Does a form in the sidebar perform better than one at the end of a post? What about a pop-up versus an embedded form?
- Incentives: Does offering a freebie (an ebook, checklist, discount code) increase sign-ups compared to no incentive?
Many advanced form builder plugins and dedicated pop-up plugins (like OptinMonster or Thrive Leads) offer built-in A/B testing capabilities. If yours doesn’t, you can manually rotate different forms or track conversions over time after making a change, though this is less precise.
Crafting Compelling Incentives
One of the most powerful ways to boost sign-ups is to offer an incentive, also known as a “lead magnet.” People are more likely to give you their email address if they receive something valuable in return.
- Exclusive Content: Offer a free ebook, a comprehensive guide, a checklist, a template, or a mini-course related to your niche.
- Discount Code: If you run an e-commerce store, a percentage-off or free shipping code for first-time subscribers is a strong motivator.
- Early Access: Provide early access to new products, features, or content.
- Free Trial/Consultation: For service-based businesses, a free trial or a brief consultation can be a great lead magnet.
- Behind-the-Scenes Content: Promise exclusive insights or sneak peeks that aren’t available to the general public.
Ensure your incentive is genuinely valuable and directly relevant to your target audience. It should solve a problem or provide significant insight that aligns with your brand.
Monitoring Performance and Analytics
Regularly check the analytics provided by your email marketing service and, if available, your WordPress plugin.
- Conversion Rates: How many visitors see your form versus how many actually sign up? This is the core metric for optimization.
- Subscriber Growth: Track the daily, weekly, and monthly growth of your list.
- Unsubscribe Rates: Keep an eye on unsubscribes. High rates might indicate you’re attracting the wrong audience, or your email content isn’t meeting expectations.
- Email Campaign Metrics: Once you start sending emails, monitor open rates, click-through rates, and bounce rates. This feedback helps you understand what resonates with your subscribers and can even inform changes to your signup process if you find you’re attracting people who aren’t interested in your actual content.
Use this data to inform your decisions. If a particular form placement isn’t converting well, try a different location. If an incentive leads to a surge in sign-ups, consider creating more similar offerings. Continuous monitoring and adaptation are key to sustained list growth.
If you’re looking to enhance your website’s engagement, adding a newsletter signup to WordPress is a great step. For more insights on how to effectively grow your audience, check out this related article on building an email list. This resource provides valuable tips that can complement your efforts in creating a successful newsletter strategy.
Maintaining and Growing Your Email List
Once you have a functional newsletter signup on your WordPress site and you’re actively gaining subscribers, the work isn’t over. Effective list maintenance and strategic growth are ongoing processes that ensure your email marketing efforts remain valuable and compliant.
Crafting Engaging Welcome Sequences
The moment someone signs up is crucial. They are highly engaged and expectant. Don’t let that momentum fade.
- Immediate Confirmation: Send an immediate “thank you” email. If you’re using double opt-in, this will be your confirmation request. If not, it’s your chance to welcome them.
- Deliver the Incentive: If you promised a lead magnet, ensure it’s delivered promptly in the welcome email or in a follow-up email.
- Introduce Yourself/Your Brand: Briefly reintroduce who you are and what your newsletter will provide. Set expectations for future emails (e.g., “expect our newsletter every Tuesday with [type of content]”).
- Call to Action: Include a small call to action, such as “Read our latest blog post here” or “Follow us on social media.”
- Ask a Question: Encourage a reply to your welcome email. This helps establish deliverability, shows you’re open to communication, and can give you valuable insights into your audience.
- Automated Series: Beyond the initial welcome, consider a short, automated sequence of 2-3 emails over the first week or two. These can share your most popular content, elaborate on your brand story, or offer additional value.
Regular Content Creation and Delivery
The core of a successful newsletter is consistent, valuable content. Don’t just collect emails; provide a reason for people to stay subscribed.
- Consistency is Key: Decide on a sending schedule (e.g., weekly, bi-weekly, monthly) and stick to it. Your subscribers will learn to expect your emails.
- Provide Value: Every email should offer something of value. This could be new blog posts, exclusive tips, industry insights, behind-the-scenes glimpses, or special offers. Avoid sending emails that are purely promotional without any added value.
- Segment Your List: As your list grows, consider segmenting it based on interests, purchase history, or engagement levels. This allows you to send more targeted and relevant emails, increasing open and click-through rates.
- Personalize Emails: Use your subscriber’s first name (if collected) in your emails. Personalization makes emails feel more human and less generic.
Ensuring GDPR and CAN-SPAM Compliance
Email marketing comes with legal responsibilities. You must ensure your newsletter practices comply with relevant data protection and anti-spam regulations.
- GDPR (General Data Protection Regulation): If you collect data from individuals in the European Union, GDPR applies.
- Clear Consent: Ensure your signup forms clearly state what subscribers are signing up for. Avoid pre-checked boxes.
- Right to Access/Erasure: Be prepared to provide subscribers with their data or delete it upon request.
- Data Minimization: Only collect the data you truly need.
- Privacy Policy: Have a clear and easily accessible privacy policy on your website that explains how you collect, store, and use subscriber data.
- CAN-SPAM Act (Controlling the Assault of Non-Solicited Pornography And Marketing Act): This US law sets rules for commercial email.
- Accurate Header Information: Your “From,” “To,” and routing information must be accurate.
- No Deceptive Subject Lines: Your subject lines must reflect the content of the email.
- Identify as an Advertisement: If the email is promotional, it should be clearly identified as such.
- Physical Address: Include your valid physical postal address in every email.
- Clear Opt-Out Mechanism: Provide a clear and easy way for recipients to unsubscribe from future emails. This link must be functional for at least 30 days after the email is sent.
- Honor Opt-Outs Promptly: Process opt-out requests within 10 business days.
Your chosen email marketing service will often have built-in features to help with compliance, such as automatic unsubscribe links and physical address fields in footers. However, it is ultimately your responsibility to understand and adhere to these regulations. By consistently providing value, maintaining your list, and respecting legal guidelines, your newsletter will become a powerful asset for your WordPress website.
P.S. Enjoyed this? Become an insider and I'll send you one of my favourite posts every couple of weeks.