The Allure of a Well-Framed Piece
You’ve finally acquired that perfect piece of art. Perhaps it’s a vibrant print from your favorite artist, a cherished photograph capturing a fleeting moment, or even a child’s masterpiece that holds immeasurable sentimental value. Whatever its form, you know it deserves to be displayed beautifully. Framing, however, can often feel like a luxury, an expensive afterthought that threatens to derail your budget. But fear not, aspiring art curator! Framing your art doesn’t have to break the bank. With a little creativity, resourcefulness, and a willingness to get your hands a little dirty, you can achieve a professional and polished look without spending a fortune. This guide will walk you through the essential steps and clever hacks to frame your art on a budget, transforming your walls into a gallery of your own making.
If you’re looking to enhance your home decor without breaking the bank, you might find the article on Creative Ways to Display Your Art particularly helpful. This piece offers innovative ideas for showcasing your artwork in unique ways, complementing the tips provided in “How to Frame Art on a Budget.” By combining affordable framing techniques with creative display methods, you can transform your space into a gallery-like environment that reflects your personal style.
Sourcing Affordable Frames
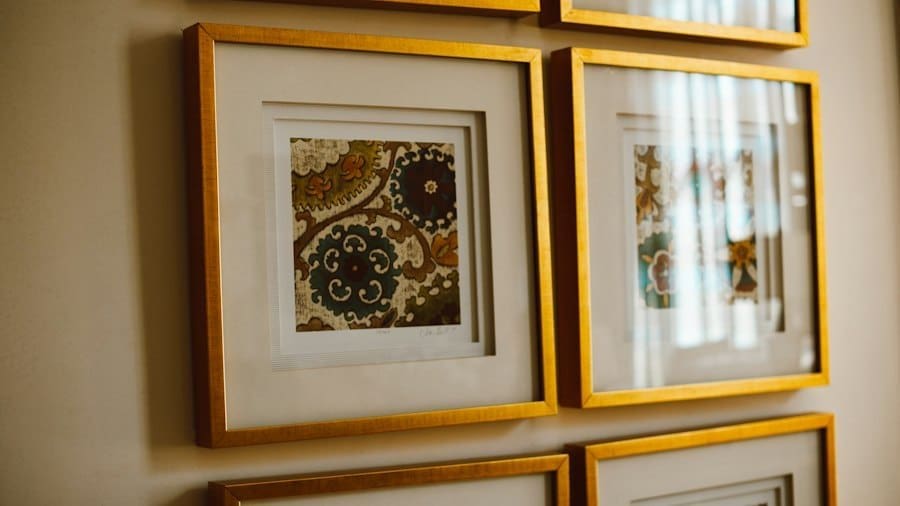
The frame itself is often the most significant expense, but there are numerous ways to find stylish and budget-friendly options. Your first instinct might be to head to a custom frame shop, but resist that urge for now. While custom framing offers unparalleled precision, it comes with a hefty price tag. Instead, let’s explore avenues that cater to the financially savvy.
Thrifting and Secondhand Finds
One of the most exciting and rewarding ways to find frames is by exploring secondhand markets. Think of it as a treasure hunt!
Exploring Thrift Stores and Charity Shops
These are goldmines for pre-loved frames. You’ll find a vast array of styles, sizes, and materials. Don’t be deterred by a less-than-perfect picture inside; you’re after the frame itself. Look for solid wood frames, ornate gilded ones, or even simple metal styles. Often, these frames come with existing matting and glass, which can be reused or replaced. Be prepared to dig, and don’t be afraid to envision how a frame could look with a fresh coat of paint or a little TLC. Inspect frames for structural integrity – check for loose corners, significant cracks, or extensive damage that might be difficult to repair. A little scratch or two is perfectly acceptable; those can add character or be easily touched up.
Hunting at Flea Markets and Garage Sales
Similar to thrift stores, flea markets and garage sales offer a diverse selection at often incredibly low prices. Haggling is sometimes an option here, so don’t be shy about trying to get an even better deal. The advantage of these venues is the potential for unique, vintage finds that might be hard to replicate elsewhere. You might stumble upon a truly antique frame that adds a distinctive touch to your artwork. Again, always check for durability and make sure the dimensions are suitable, or at least adaptable, for your piece.
Online Marketplaces and Freecycle Groups
Websites like Facebook Marketplace, Craigslist, and local Freecycle groups are excellent resources for finding free or very inexpensive frames. Many people are simply looking to declutter and are happy to give away perfectly good frames. Set up alerts for “picture frames” or “art frames” in your area. Be quick to respond, as good deals tend to go fast. Always arrange for a safe meeting place when dealing with online transactions.
Affordable Retailers
If secondhand isn’t your style, or you need a specific size or aesthetic, several retailers offer budget-friendly new frames.
Discount Stores and Home Goods Retailers
Stores like IKEA, Target, Walmart, and Michaels (especially with their frequent sales and coupons) are fantastic for basic, ready-made frames. They offer a range of standard sizes, colors, and materials like wood, metal, and plastic. While they might not be heirloom quality, they are perfectly adequate for most purposes and can look surprisingly chic when paired with the right artwork and matting. Look out for multi-packs of frames if you’re planning a gallery wall.
Online Frame Shops with Sales
Many online frame retailers have regular sales and clearance sections. Websites like Frame It Easy, ArtToFrames, and even Amazon often have discounts on standard-sized frames or offer promotions for bulk purchases. Subscribing to their newsletters can alert you to upcoming sales. While you won’t get the custom fit of a local framer, these online options can be a significant step up from discount store frames in terms of quality and variety, often at a fraction of the cost of traditional custom framing.
The Art of Matting: A Budget-Friendly Secret Weapon

Matting, the border material that surrounds your artwork within the frame, is often overlooked but plays a crucial role in presentation and protection. It creates visual breathing room, draws the eye to the art, and can even make a smaller piece feel more substantial. The good news? You can achieve a professional look without splurging on custom-cut mats.
Benefits of Matting
Beyond aesthetics, matting serves a practical purpose. It creates a physical barrier between your artwork and the glass, preventing the art from sticking to the glass, which can cause damage over time, especially in humid environments. It also adds a layer of depth and sophistication, making your artwork appear more deliberate and gallery-worthy.
DIY Matting Techniques
Cutting your own mats can seem daunting, but with the right tools and a bit of practice, it’s entirely achievable and significantly cheaper than custom cutting.
Purchasing Mat Board Sheets
Art supply stores and even some larger craft stores sell full sheets of mat board. These come in various colors, thicknesses, and finishes. Opt for acid-free or archival quality mat board, especially for valuable or sentimental pieces, as this will prevent the mat from yellowing or damaging your artwork over time. White or off-white are classic, versatile choices, but don’t be afraid to experiment with subtle colors that complement your art.
Essential Tools for Mat Cutting
To cut your own mats, you’ll need a few key tools:
- Mat Cutter: This is the most important tool. You can find handheld models that are surprisingly effective for occasional use, or more advanced table-top cutters for more frequent projects. A straight edge with a non-slip backing is also crucial.
- Utility Knife or X-Acto Knife: For general cutting and precise trimming.
- Metal Ruler: Essential for accurate measurements and providing a guide for your cutter. Ensure it’s metal, as plastic rulers can be easily nicked by the blade.
- Cutting Mat: Protects your work surface and helps preserve the sharpness of your blades.
- Pencil and Eraser: For marking your cut lines.
Step-by-Step Mat Cutting
- Measure Your Artwork: Precisely measure the height and width of your artwork.
- Determine Mat Borders: Decide how wide you want your mat borders to be. A common rule of thumb is to have the bottom border slightly wider than the top and sides, but this is a matter of personal preference.
- Calculate Window Opening: Subtract your desired border widths from the artwork dimensions to determine the size of the mat’s inner opening (the window). Remember, the window should be slightly smaller than your artwork (by about 1/8 to 1/4 inch on each side) so that the mat slightly overlaps the edges of the art, holding it in place.
- Mark the Mat Board: Lightly mark the dimensions of your window opening on the back of the mat board. This is where you’ll be cutting from.
- Cut the Window: Place your mat board on the cutting mat. Align your metal ruler with your marked lines. Using your mat cutter, make a clean, angled cut (most mat cutters are designed to cut at a bevel). It’s often best to make several light passes rather than one deep cut, especially when you’re starting out. Practice on scrap pieces first!
- Attach Artwork: Once the mat is cut, carefully center your artwork behind the mat opening. Secure it to the back of the mat using acid-free hinging tape (available at art supply stores). Only tape the top edge of your artwork to the mat; this allows the art to “breathe” and prevents buckling due to humidity changes.
Pre-Cut Mat Options
If DIY mat cutting seems too intimidating, don’t despair!
Standard-Sized Pre-Cut Mats
Many craft stores and online retailers sell pre-cut mats in standard frame sizes (e.g., 8×10, 11×14, 16×20) with common opening sizes. You might be able to find one that perfectly fits your art and frame. This is a quick and easy solution, especially if your art happens to be a standard size.
Using Existing Mats from Thrifted Frames
Remember those thrift store finds? Often, they come with mats. Even if the mat isn’t the right color or has some minor imperfections, you can use it as a template to cut a new mat from fresh mat board, saving you the effort of measuring and ensuring a perfect fit for the frame. Alternatively, if the existing mat is in good condition but the wrong color, you might be able to carefully paint it with acrylic paint for a quick refresh.
Framing Techniques for a Professional Look
Once you have your frame and your mat (or have decided to go mat-less), it’s time to assemble everything. This stage is crucial for ensuring your artwork is displayed beautifully and protected for years to come.
Preparing Your Artwork
Before placing your art into the frame, make sure it’s clean and ready.
Cleaning and Flattening
For prints and photographs, gently wipe any dust or fingerprints with a clean, lint-free cloth. If your artwork is rolled or curled, you can flatten it by placing it face down on a clean, flat surface, covering it with a clean sheet of acid-free paper, and then placing heavy, flat objects (like books) on top for a few days. Ensure the weight is evenly distributed. For original artwork, consult with an art conservator if it requires extensive cleaning or repair; otherwise, gentle dusting is usually sufficient.
Archival Mounting (Hinging)
As mentioned in the matting section, if you’re using a mat, hinge your artwork to the back of the mat using acid-free linen tape or conservation tape. This allows the art to expand and contract slightly with humidity changes without buckling. If you’re not using a mat, you can hinge the artwork directly to the acid-free foam core backing (discussed below). Avoid using permanent adhesives like glue sticks or spray adhesive directly on your artwork, as these can cause irreparable damage over time.
Assembling the Frame Components
This is where all your efforts come together.
The Layering Order
The typical order from front to back is:
- Glass/Plexiglass: This protects your artwork from dust, UV light, and physical damage.
- Mat (optional): Provides breathing room and visual appeal.
- Artwork: Your masterpiece!
- Backing Board: Provides rigidity and support. Acid-free foam core is ideal, but sturdy cardboard can work for less valuable pieces.
- Frame Backing: The original back of the frame, usually held in place by bendable tabs or clips.
Cleaning the Glass
Before you assemble, meticulously clean both sides of the glass or plexiglass. Use a glass cleaner and a microfiber cloth to avoid streaks and lint. Dust specks trapped between the glass and the art can be incredibly distracting once framed. Do this right before you put everything together to minimize new dust accumulation.
Securing the Backing
Once all layers are stacked neatly within the frame, carefully secure the backing board with the frame’s existing tabs or clips. If your frame doesn’t have these, or they are flimsy, you can use framer’s points (small metal tabs inserted with a special tool) or even small brads (tiny nails) carefully hammered in around the edge. For a more budget-friendly approach, strong masking tape or painter’s tape can be used to seal the edges of the backing board to the frame, preventing dust from entering. Ensure everything is snug but not overly tight, which could warp the frame or damage the artwork.
If you’re looking to enhance your living space without breaking the bank, you might find it helpful to explore various creative solutions for home decor. One interesting read is an article that discusses the benefits and drawbacks of remote work in 2024, which can inspire you to create a more personalized workspace. You can check it out here for insights that could complement your art framing project and help you make the most of your environment.
Creative & Budget-Friendly Alternatives
Sometimes, a traditional frame isn’t the only answer, or perhaps you’re looking for something a bit more unconventional. There are many creative ways to display art without a hefty framing cost.
DIY Frame Enhancements
Even the most basic frame can be transformed with a little imagination.
Painting and Stenciling
A cheap, plain wooden frame can become a stunning piece with a coat of paint. Choose a color that complements your artwork or your room decor. You can distress the paint for a shabby-chic look, or use stencils to add intricate patterns. Spray paint offers a smooth finish and is quick to apply, while acrylic paints allow for more detailed brushwork. Always clean and lightly sand the frame before painting for better adhesion.
Adding Decorative Elements
Think beyond just paint. You can glue on small embellishments like beads, faux flowers, seashells, twigs, or even old jewelry pieces to give a frame a unique, personalized touch. Fabric scraps can be glued to the frame for a textural effect. For a minimalist yet striking look, consider wrapping a plain frame in twine or thin rope.
Upcycling Old Mirrors or Windows
Got an old mirror with a beautiful frame, but the mirror itself is cracked or dated? Remove the mirror and replace it with your artwork! Similarly, old window frames can be repurposed. You might need to add a backing board and a way to hold the art in place, but the frame itself provides a unique, architectural element.
Alternative Display Methods
Not everything needs a traditional frame to look great.
Clipboards and Hangers
For prints, posters, or even children’s art, clipboards offer a wonderfully casual and changeable display method. You can hang them individually or in a cluster. Similarly, magnetic poster hangers or wooden poster rails can frame a piece at the top and bottom, providing a clean, modern look without the bulk or expense of a full frame. These are fantastic for larger prints or fabrics.
Washi Tape Borders
For a super temporary, fun, and inexpensive “frame,” use decorative washi tape directly on your wall around the edges of your artwork. This is particularly great for lightweight prints, photos, or postcards. Washi tape comes in countless colors and patterns and is usually removable without damaging your walls. You can create single-line borders, layered borders, or even intricate corner designs.
Floating Displays and Mounts
For a minimalist look, consider mounting your artwork directly onto a sturdy foam board backing, then hanging the foam board. You can even create a “float” effect by mounting a smaller piece of art onto a larger, contrasting foam board. Use command strips or small picture-hanging nails for a sleek, frameless appearance. For canvases, simply hanging them directly on the wall is often enough, as the canvas itself provides a three-dimensional quality.
If you’re looking to enhance your home decor without breaking the bank, you might find it helpful to explore some creative ideas on how to frame art on a budget. In addition to that, you can also discover how to effectively promote your artistic endeavors online by reading about the benefits of utilizing WordPress for your business success. This resource can provide valuable insights into building a strong online presence, which can complement your artistic journey. For more information, check out this article on unleashing the power of WordPress websites.
Maintaining Your Framed Art
Once your art is beautifully framed and displayed, a little ongoing care will ensure it remains a source of joy for years to come.
Proper Placement
Where you hang your art can significantly impact its longevity.
Avoiding Direct Sunlight
Direct sunlight is the enemy of artwork. UV rays can fade colors, yellow paper, and cause materials to degrade. Avoid hanging valuable or cherished pieces in direct sunlight. If a spot is unavoidable, consider using UV-protective glass or plexiglass, though this can add to the cost.
Humidity and Temperature Control
Extreme fluctuations in humidity and temperature can cause art to warp, buckle, or even grow mold. Avoid hanging art in bathrooms, kitchens, or directly above radiators or fireplaces, where humidity and temperature swings are common. A stable environment is key.
Cleaning and Care
Regular, gentle cleaning will keep your framed art looking its best.
Dusting the Frame and Glass
Dust accumulates everywhere. Gently dust the frame and glass regularly with a soft, dry microfiber cloth. For smudges on the glass, use a small amount of glass cleaner sprayed onto your cloth (never directly onto the glass, as it can seep under the frame and damage the art). Wipe gently. Avoid abrasive cleaners or cloths that could scratch the glass or damage the frame finish.
Inspecting for Damage
Periodically inspect your framed art for any signs of damage. Check for loose frame corners, dust or insects that might have found their way inside, or any signs of mold or discoloration on the artwork itself. Addressing small issues promptly can prevent them from becoming larger, more costly problems. If you notice any significant issues, especially with valuable pieces, consider consulting a professional art conservator.
Framing art on a budget is not just about saving money; it’s about embracing creativity, resourcefulness, and the satisfaction of a DIY project. With these tips and techniques, you’re well-equipped to transform your art collection into a stunning display that reflects your style and passion, without draining your wallet. Happy framing!
P.S. Enjoyed this? Become an insider and I'll send you one of my favourite posts every couple of weeks.