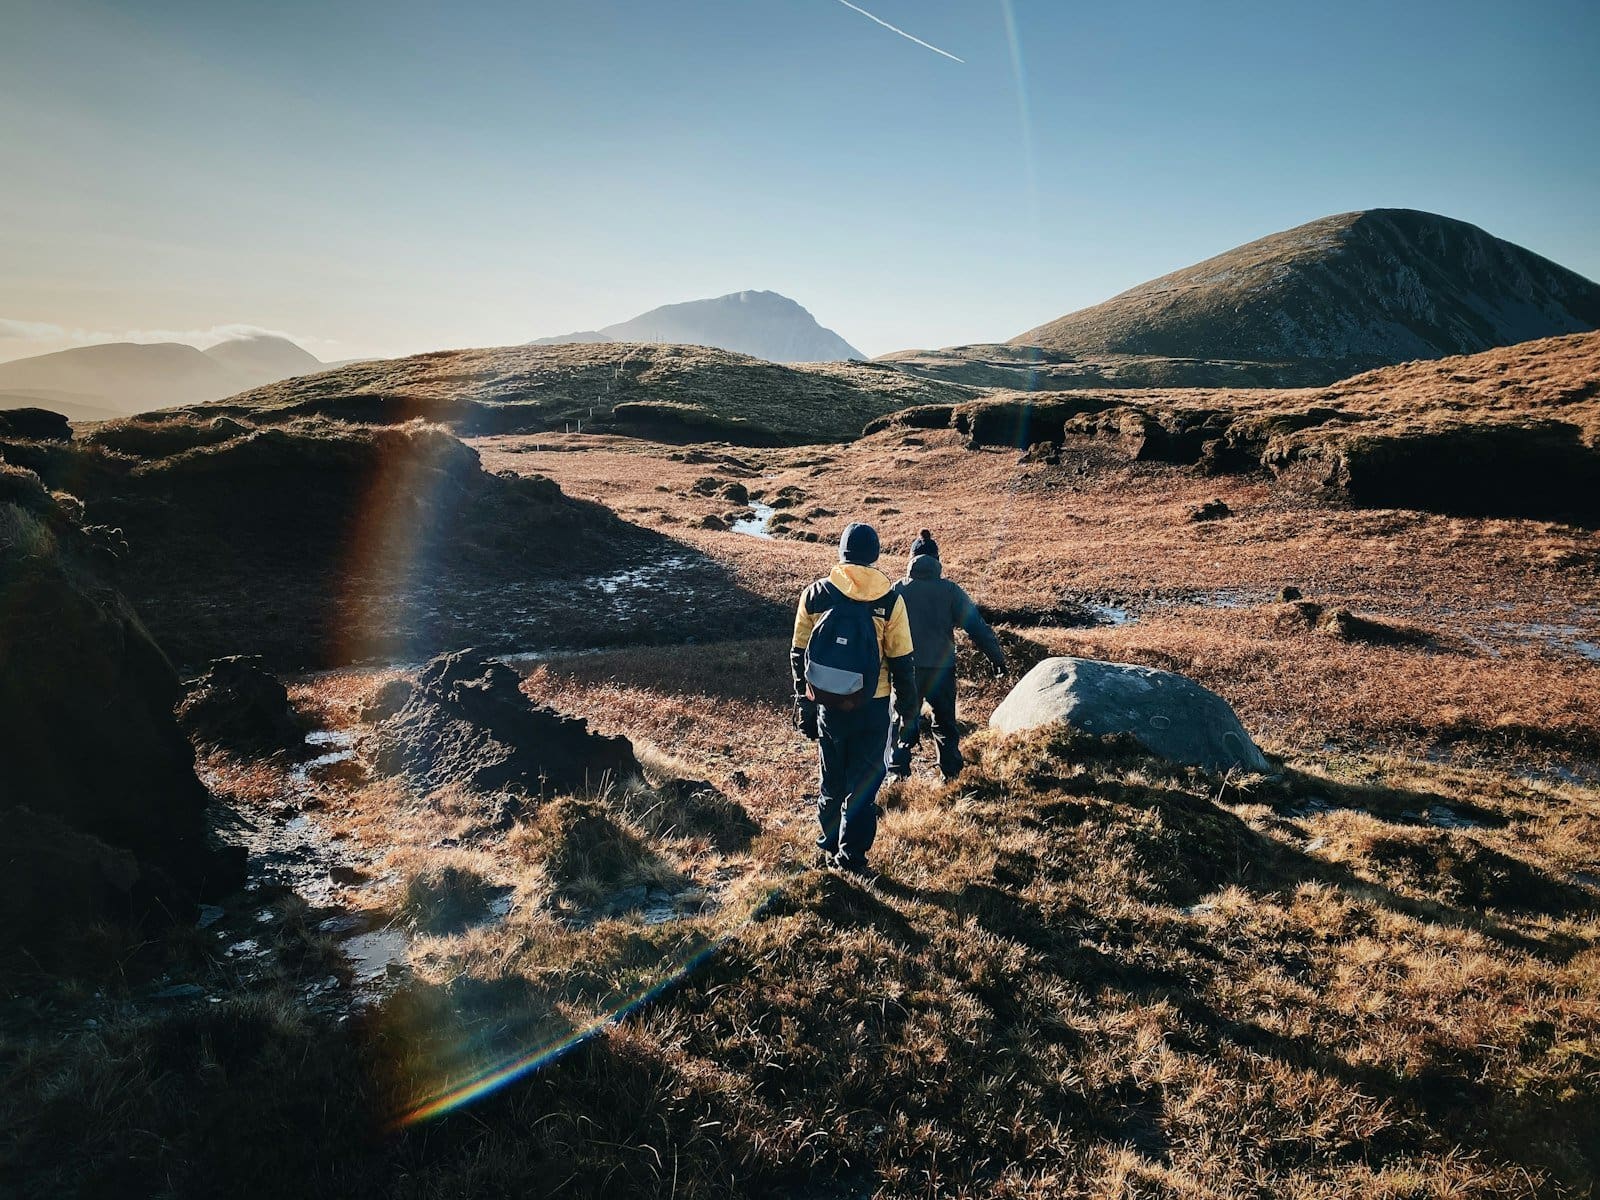
Hillwalking for beginners: the gear you need, mountain safety, reading the weather and the best easy first climbs in Ireland.

Embarking on the Hillwalking Journey
The crisp air, the rustling leaves, the panoramic views that stretch to the horizon – there's something undeniably captivating about hillwalking. For me, it started as a fleeting curiosity, a desire to escape the urban sprawl and reconnect with something more primal. Now, it's a profound passion, a source of solace and exhilaration. If you're reading this, chances are you're feeling that same tug, that whisper of the wild. Perhaps you’ve seen breathtaking photos, heard tales of adventure, or simply yearn for a different kind of challenge. Welcome aboard!
This article is my attempt to distill years of experience, a journey of countless steps and invaluable lessons, into a practical guide for those just starting out. I remember the overwhelming feeling of not knowing where to begin, the fear of making a wrong turn, and the confusion over what gear was truly essential. My aim here is to cut through that noise, offering clear, actionable advice to help you take those crucial first steps safely and enjoyably into the wonderful world of hillwalking. It's not about conquering the highest peaks right away, but about building confidence, appreciating the journey, and fostering a deep respect for the natural world.
My Initial Fears and How I Overcame Them
When I first considered hillwalking, a multitude of concerns swirled in my mind. Would I get lost? What if the weather turned bad? Was I fit enough? These anxieties are perfectly normal, and honestly, they're a sign of responsible thinking. My first step was acknowledging them rather than letting them paralyze me. I started small, choosing well-marked trails in popular local parks with minimal elevation gain. I went with friends who had a little more experience, absorbing their knowledge like a sponge. I meticulously checked weather forecasts, sometimes multiple times a day.
I learned to read trail maps, even for short walks, just to familiarize myself with the symbols and contours. Gradually, with each successful outing, my confidence grew. The fear began to recede, replaced by a growing sense of capability and excitement. It’s a process, not an instant transformation, and I want you to know that those initial jitters are a natural part of the learning curve. Embracing a cautious approach and gradually expanding your comfort zone is key.
For those interested in exploring the great outdoors through hillwalking, it's essential to equip yourself with the right knowledge and tools. A related article that can enhance your understanding of building a successful online presence for your hillwalking adventures is available at this link: Unleashing the Power of WordPress Websites for Your Business Success. This resource provides valuable insights into how to effectively showcase your experiences and gear online, helping you connect with fellow enthusiasts and share your journey.
Essential Gear for the Aspiring Hillwalker
When I first started, I thought I needed to buy all the most expensive, high-tech gear immediately. Big mistake! While good gear is important, especially for safety and comfort, you don’t need to break the bank to get started. My philosophy now is to invest wisely in a few key items and then build up your collection as your experience grows and your needs become clearer. Think of it as a journey, not a sprint, towards a perfectly equipped kit. I'll share what I've found to be truly indispensable, focusing on the "must-haves" before the "nice-to-haves."
Footwear: Your Foundation for Every Step
This, for me, is the absolute most critical piece of gear. My feet carry me over every root, rock, and muddy patch, and if they’re unhappy, my whole walk is miserable. I learned this the hard way, with blisters the size of small coins after an ill-advised walk in regular trainers.
Understanding Different Boot Types
There's a spectrum of footwear designed for different terrains and conditions. For beginners, I recommend a good pair of walking shoes or lightweight hiking boots.
- Walking Shoes: These are excellent for well-maintained paths, gentler slopes, and dry conditions. They offer more flexibility and are lighter than boots. Look for good grip, adequate cushioning, and some water resistance. I often use these for my shorter, local walks.
- Lightweight Hiking Boots: These offer more ankle support and often better waterproofing than walking shoes. They’re a fantastic all-rounder for varied terrain, including slightly rockier paths, mud, and moderate hills. This is what I’d suggest as your first serious purchase. They're a good balance of support, protection, and comfort for most beginner and intermediate trails.
- Mid-weight to Heavyweight Hiking Boots: As you progress to more challenging, rocky, or technical terrain, or if you plan on carrying heavier loads, you might consider these. They offer maximum ankle support, stiffness, and durability. However, they can be overkill (and uncomfortable) for easier walks.
Key Features to Look For
Regardless of the type, when I'm trying on footwear, I prioritize these features:
- Comfort: This is paramount. They should feel comfortable right out of the box. Don’t expect to "break them in" to solve fundamental discomfort. Your toes should have room to wiggle, and your heel should feel secure without slipping. Try them on with the type of socks you’ll be wearing.
- Grip: The sole should have a good lug pattern for traction on various surfaces, especially wet rock or mud.
- Waterproofing: While not always essential, a waterproof membrane (like Gore-Tex) is a huge bonus, keeping your feet dry in unexpected showers or damp conditions. There's nothing worse than cold, wet feet!
- Ankle Support: Especially for boots, this helps prevent twists and sprains, particularly when walking on uneven ground.
Backpack: Carrying Your Essentials
Once I learned to properly pack my bag, my walks became so much more enjoyable. A poorly packed bag with items digging into your back or swinging awkwardly can quickly become a nuisance.
Choosing the Right Size
For day hikes, I typically use a backpack in the 20-35 litre range. This size is usually sufficient for water, snacks, extra layers, a first-aid kit, and other essentials. If you're doing shorter, warmer weather walks, a 15-20 litre pack might suffice. For longer, more remote days where you might carry more emergency gear or food, I might go up to 35-40 litres.
Features I Value
- Comfortable Straps and Hip Belt: The weight should ideally be distributed across your hips, not just your shoulders. A padded hip belt makes a huge difference, especially as the day progresses.
- Ventilation: A back panel designed to allow airflow helps prevent a sweaty back, which is surprisingly refreshing on a warm day.
- Pockets: External pockets for water bottles, a top lid pocket for quick-access items (like snacks or a map), and perhaps a front stash pocket are all very useful.
- Rain Cover: Many good hiking backpacks come with an integrated rain cover, which is invaluable for keeping your contents dry. If yours doesn't, buy one separately. My phone and electronics are too precious to risk getting soaked!
+ Join Our Writing Community for FREE
Chain Story Online
Fun, free, flash fiction writing with writers just like you. You have ~100 words to begin a story or continue a story and make it yours.
Story Bible Studio
Digital space for writers to plot, plan, and build better stories. Designed by writers for writers. Your final draft awaits.
Layers of Clothing: Adapting to the Mountains
The weather in the hills, even on a seemingly fine day, can be incredibly unpredictable. I've been caught out by sudden drops in temperature, unexpected showers, and strong winds more times than I care to admit. The key is layering. This allows you to add or remove clothing as conditions change, ensuring you stay comfortable and safe.
The Three-Layer System I Swear By
- Base Layer (Wicking Layer): This is the layer next to your skin. Its job is to wick moisture (sweat) away from your body to keep you dry. I almost exclusively use merino wool or synthetic fabrics (like polyester). Avoid cotton at all costs; once it gets wet, it stays wet and will make you cold.
- Mid-Layer (Insulation Layer): This layer provides warmth. Fleece jackets (various thicknesses) are excellent choices. Down or synthetic insulated jackets are also great for colder conditions, though fleece is often sufficient for beginners in milder climates.
- Outer Layer (Shell Layer): This is your protection against wind and rain. A good quality waterproof and windproof jacket is essential. Look for features like a hood (crucial!), adjustable cuffs, and taped seams. I also carry waterproof trousers, especially if there's any chance of rain or crossing boggy ground.
Other Clothing Considerations
- Trousers: I wear lightweight, quick-drying hiking trousers. They're much more comfortable than jeans, which hold water and restrict movement.
- Socks: Good quality hiking socks are vital. Merino wool or synthetic blends help prevent blisters by wicking moisture and providing cushioning.
- Hat and Gloves: Even on a mild day, a lightweight hat and gloves can make a huge difference if the wind picks up or the temperature drops. I always pack them, just in case.
Navigation Tools: Knowing Where You Are and Where You're Going
This is where many beginners feel intimidated, but it needn't be. Modern technology has made navigation much more accessible, but I still believe in the foundational skills.
Map and Compass
Learning to read a topographical map (the kind with contour lines) and use a compass is a fundamental skill that every hillwalker should acquire. It’s a bit like learning to drive a manual car – while automatics are common, understanding the basics gives you so much more control and understanding. I always carry a physical map of the area, even if I'm using a GPS device. Batteries die, signals drop, and a paper map never fails.
GPS Devices and Apps
My smartphone, loaded with a reputable mapping app (like AllTrails, Gaia GPS, or OS Maps in the UK), is my primary navigation tool now. These apps often allow you to download maps for offline use, track your progress, and pinpoint your exact location. Dedicated GPS devices are also an option, offering robust construction and longer battery life. Always carry a power bank to recharge your phone or GPS device.
Safety First: Essential Protocols and Preparedness
My golden rule for hillwalking is simple: safety always comes first. The mountains are beautiful and inspiring, but they are also powerful and unforgiving if treated with disrespect or carelessness. I’ve learned through experience, and by observing others, that preparation and a cautious mindset are your best allies.
Planning Your Route and Checking Conditions
Before I even think about lacing up my boots, I dedicate time to planning. This isn't just about knowing the destination; it’s about understanding the journey.
Researching Your Chosen Trail
- Difficulty and Length: For your first few climbs, choose well-marked, beginner-friendly trails. Check the total distance, elevation gain, and estimated completion time. Websites like AllTrails, national park sites, or local hiking guides are excellent resources. I always add a buffer to the estimated time, especially when I’m exploring new terrain.
- Terrain: Will it be rocky, muddy, steep, or exposed? Knowing this helps you choose appropriate footwear and clothing.
- Water Sources: If it’s a longer walk, are there places to refill your water bottle, or do you need to carry all your supply?
- Access and Parking: How do you get there? Is there ample parking, and are there any fees or restrictions?
Weather Forecasts: My Non-Negotiable Check
I check the weather forecast from multiple reliable sources (e.g., national meteorological services, mountain-specific forecasts) the day before, and then again on the morning of my hike.
- Temperature: What are the highs and lows? How will the wind chill affect it?
- Precipitation: Is rain, snow, or hail expected? This dictates my waterproof gear.
- Wind Speed: High winds can make even a mild day feel bitterly cold and can be dangerous on exposed ridges.
- Visibility: Fog and mist can descend quickly in the hills, making navigation incredibly challenging. If low visibility is forecast, I might reconsider my route or postpone my walk.
What to Do in an Emergency
Even with the best planning, things can go wrong. Being prepared for emergencies isn't about being paranoid; it's about being responsible.
My Essential Safety Kit
Beyond the basic gear, I always carry a small emergency kit:
- First-Aid Kit: Bandages, antiseptic wipes, pain relievers, blister plasters (my saviour!), and any personal medications. I’ve customized mine over time to include items I’ve actually needed.
- Headlamp/Torch: Even if I plan to be back before dark, I always carry one. Delays happen, and navigating in the dark without a light is dangerous.
- Whistle: For attracting attention if I'm lost or injured. The international distress signal is six blasts repeated after a minute’s pause.
- Emergency Shelter/Bivy Bag: A lightweight, reflective bag or small tarp can provide crucial shelter from wind and rain if you get stranded or need to wait for help.
- Fully Charged Phone and Power Bank: For emergencies, but also for checking maps or sending updates.
- Extra Food and Water: More than you think you'll need, in case your walk takes longer than expected. High-energy snacks like nuts, dried fruit, or chocolate are great.
The Importance of Telling Someone Your Plans
This is a non-negotiable step for me, every single time. I always tell a trusted friend or family member:
- My exact route plan.
- Where I'm parking.
- My estimated start and finish times.
- Who I’m with (if anyone).
- What to do if I haven't checked in by a certain time (e.g., call mountain rescue, local police).
This simple step ensures that if something does go wrong, someone knows where to look for you.
Your First Climbs: Where to Begin
The excitement of that first proper hillwalk is a feeling I remember vividly. It's about choosing the right challenge, one that builds confidence without being overwhelming. My advice is always to start easier than you think you need to. There’s no shame in turning back if conditions change or you're not feeling up to it. The mountain will still be there another day.
Choosing Your First Trails
For beginners, I strongly recommend focusing on well-established trails that are easy to follow and have a clear path.
National Parks and Designated Hiking Areas
These are often excellent starting points. They typically have:
- Well-maintained trails: Often signposted, making navigation simpler.
- Visitor centres: Where you can get maps, local advice, and up-to-date weather information.
- Varying difficulty levels: Allowing you to choose routes suitable for your fitness and experience.
- Higher foot traffic: Meaning you’re less likely to be completely alone if you need assistance.
Local Hills and Countryside Walks
Don't overlook the beauty and challenge of hills closer to home. Even smaller hills can offer stunning views and a good workout. I started on local trails, gradually increasing the distance and elevation. This allowed me to test my gear, practice navigation, and gauge my fitness levels without the added pressure of being in a remote, unfamiliar environment. Look for walks that are a few hours long, rather than full-day expeditions, for your initial outings.
Pacing Yourself and Listening to Your Body
This is probably one of the most important lessons I’ve learned. It’s not a race.
Steady and Sustainable
When I’m starting out on a new walk, I aim for a steady, comfortable pace. If I'm huffing and puffing within the first 15 minutes, I know I'm going too fast. Remember that your pace will likely be slower on uphill sections and rougher terrain.
- Take regular breaks: Short breaks every 30-60 minutes to rehydrate, have a snack, and admire the view are far better than pushing yourself to exhaustion.
- Hydrate frequently: I take sips of water often, rather than waiting until I'm parched. Electrolyte tablets can also be beneficial on longer, warmer walks.
- Snack for energy: Keep your energy levels up with easily digestible snacks.
Don’t Be Afraid to Turn Back
I've learned that ego has no place in the mountains. If the weather deteriorates, if you're feeling unwell, if you're running out of daylight, or if the terrain is beyond your comfort zone, it is perfectly acceptable, and often the wisest decision, to turn back. There have been times I’ve had to cut a walk short, and while initially disappointing, I've never regretted prioritizing my safety. The mountain will always be there for another attempt when conditions are more favourable or your confidence is higher.
For those eager to embark on their hillwalking journey, understanding the essentials of gear, safety, and initial climbs is crucial. A great resource that complements the topic of hillwalking for beginners is an article that details a specific adventure, offering insights into the experience of conquering Nephin. This article not only highlights the beauty of the landscape but also provides practical tips for those looking to tackle their first summit. You can read more about this inspiring journey by visiting Conquering Nephin: A Walk to the Summit.
If you're looking for a collaborative writing platform, check out Chain Story Online. It's a great way to connect with other writers and create stories together. Many users have found inspiration and creativity through Chain Story Online.
Embracing the Journey: Respect, Learning, and Connection
Hillwalking, for me, is far more than just physical exercise; it's a holistic experience that nourishes the mind and soul. It's a continuous learning process, a chance to connect with nature, and an opportunity for introspection.
Leave No Trace Principles: My Guiding Ethic
I adopted the "Leave No Trace" principles early in my hillwalking journey, and they have become fundamental to how I interact with the outdoors. It's about minimizing our impact and preserving these beautiful spaces for everyone.
The Seven Principles I Follow
- Plan Ahead and Prepare: As discussed, this includes knowing the regulations, checking the weather, and carrying appropriate gear.
- Travel and Camp on Durable Surfaces: Stick to marked trails to prevent erosion and protect delicate vegetation.
- Dispose of Waste Properly: Pack out everything you pack in, including food scraps and toilet paper. I always carry a small bag specifically for trash.
- Leave What You Find: Don’t take rocks, plants, or historical artifacts. Allow others to discover and enjoy them.
- Minimize Campfire Impacts: Use established fire rings, keep fires small, and ensure they are completely out. (For hillwalking, I rarely need a fire, but if you're camping, this is crucial).
- Respect Wildlife: Observe animals from a distance, never feed them, and store food securely.
- Be Considerate of Other Visitors: Yield to uphill hikers, keep noise levels down, and respect private property.
Following these principles is not just about rules; it's about being a responsible steward of the natural environment that gives us so much joy.
Continuous Learning and Skill Development
My hillwalking journey is far from over; it's an ongoing process of learning, challenging myself, and refining my skills.
Expanding Your Horizons
Once you're comfortable with easier trails, consider gradually increasing the difficulty. This might involve:
- Longer distances: Building your endurance.
- More elevation gain: Strengthening your legs and lungs.
- Rougher terrain: Improving your footwork and balance.
- Navigating off-trail (with caution and experience): Developing advanced map and compass skills.
I've found joining local hiking clubs or guided walks to be an excellent way to learn from more experienced individuals and discover new routes. They often offer navigation courses or workshops that can further enhance your skills.
Embracing the Solitude and the Company
Sometimes I crave the peaceful solitude of the hills, where the only sounds are the wind and my footsteps. Other times, I cherish the camaraderie of sharing a challenging climb and a breathtaking view with friends. Hillwalking offers both. It’s a chance to connect with myself, to clear my head, and to appreciate the simplicity of being present in nature. It's also a fantastic way to build lasting friendships and share incredible experiences.
Final Thoughts on Hillwalking for Beginners
For me, hillwalking began as a personal quest for adventure and has evolved into a deeply fulfilling aspect of my life. It has taught me resilience, patience, and a profound appreciation for the natural world. I hope this guide provides you with the confidence and knowledge to embark on your own hillwalking journey. Start small, be prepared, respect the environment, and most importantly, enjoy every single step. The hills are calling, and I truly believe you'll find something special waiting for you out there.
Related reading: The Mental Health Benefits of Walking · Walking 10,000 Steps a Day: Does It Really Matter?
Enda Storrie is a writer and the creator of Story Bible, the planning journal and app for writers, and Chain Story Online, a free collaborative storytelling platform.