Secure your Wi-Fi network in 10 minutes: change router passwords, use WPA3, update the firmware and set up a guest network.
Initial Reconnaissance: My First Steps to Wi-Fi Security
When I think about my home network, I often picture it as a digital fortress. But, let's be honest, for many years, that fortress had an open drawbridge and a welcome mat. The idea of securing my Wi-Fi used to feel like a monumental task, something reserved for IT professionals with arcane knowledge. However, I’ve since discovered that bolstering my wireless defenses doesn't require a computer science degree or hours of intricate configuration. In fact, I've learned to significantly improve my network's security in about ten minutes, and I want to share my streamlined approach with you.
My journey began with a simple realization: neglecting Wi-Fi security is akin to leaving my front door unlocked for anyone to wander in, whether they're a nosy neighbor trying to freeload on my internet or a malicious actor seeking access to my personal data. The potential consequences, from identity theft to compromised financial information, quickly motivated me to take action. This initial reconnaissance phase wasn't about implementing complex solutions, but rather about understanding the fundamental vulnerabilities and identifying the low-hanging fruit of Wi-Fi security.
My first step, and arguably the most crucial, was to locate my router. This might sound ridiculously simple, but in many homes, the router is tucked away in a corner, out of sight and out of mind. For me, it was nestled behind a bookshelf, blinking away with its mysterious lights. Once I found it, I knew I needed to access its administrative interface.
This is the control panel for my entire network, and gaining access to it is the gateway to implementing any security measures. I also made a mental note of its make and model, as this information is often helpful when consulting online resources or my internet service provider's support pages. I wasn’t aiming for perfection at this stage, but rather a foundational understanding of what I was working with. It was about surveying my digital landscape before drawing up battle plans.
Locating My Router and Its Credentials
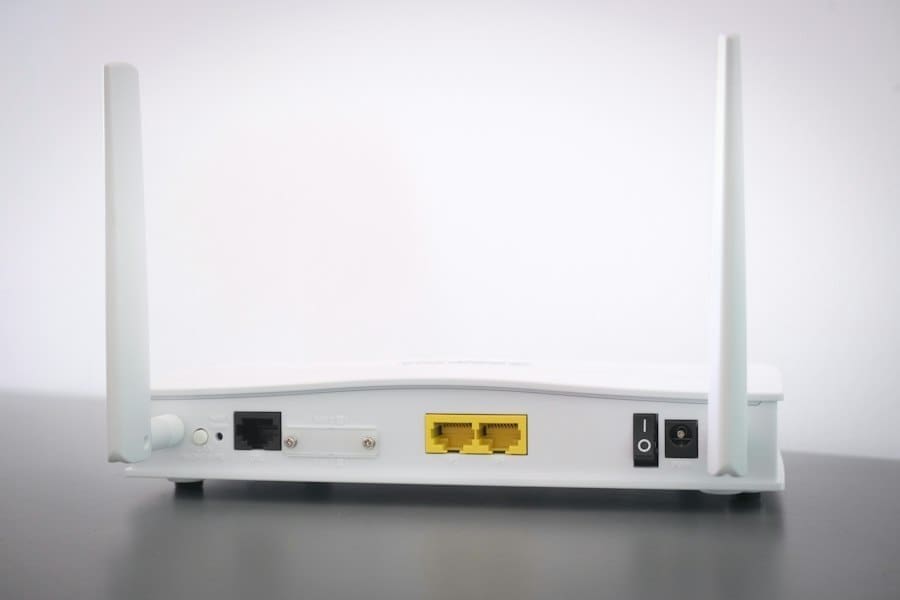
My router, a fairly standard model provided by my internet service provider (ISP), was surprisingly easy to locate once I decided to actively look for it. It's often a small box with several antennas, typically sporting lights that indicate power, internet connectivity, and Wi-Fi activity. On the back or bottom of the router, I found a label.
This label is a treasure trove of information, usually containing the default Wi-Fi network name (SSID), the default Wi-Fi password, and, most importantly for my immediate task, the router's IP address and the default administrator username and password. I cannot stress enough how vital this information is. For many years, I ignored this label, assuming the network was "just working." Now, I see it as the key to my digital kingdom.
Understanding the Importance of Router Access
Accessing my router's administrative interface is like gaining control of the central command center for my home network. It's where all the magic (and potential vulnerabilities) happens. Without access, I'm completely at the mercy of default settings, which are often designed for convenience rather than robust security. I’ve come to realize that a default router password is a glaring security flaw, akin to leaving my front door open with a "come on in" sign. Most routers ship with generic passwords like "admin," "password," or simply no password at all.
These are widely known and easily guessed by anyone with even a rudimentary understanding of network security. My immediate goal, therefore, was to move beyond these perilous defaults and establish a more secure gateway. This initial understanding of the lay of the land, of where my router was and how to access its brain, was the absolutely essential first step in my journey to securing my Wi-Fi network.
For those looking to enhance their online security, a related article that may pique your interest is "Conquering Nephin: A Walk to the Summit." While it primarily focuses on an adventurous hike, it also touches on the importance of being aware of your surroundings and securing your personal information, which can be tied back to the necessity of protecting your Wi-Fi network. You can read more about it here: Conquering Nephin: A Walk to the Summit.
Fortifying My Digital Gates: Essential Password Changes
Once I had located my router and understood the importance of its administrative access, my next immediate priority was to fortify what I call my "digital gates." This essentially meant changing all the default passwords associated with my network. I recognize that this might sound obvious to some, but for years, I was completely oblivious to the inherent risks of leaving these defaults untouched. I viewed my Wi-Fi as a convenience, not a potential security liability.
However, after a bit of research and a growing concern for my online privacy, I learned that default passwords are the easiest targets for anyone attempting to compromise my network. They are often publicly available online, or easily guessed through brute-force attacks. My goal in this step was to eliminate these glaring vulnerabilities and establish a foundation of strong, unique credentials.
My ten-minute timer started ticking here. I knew I couldn't afford to waste time, so I focused on the two most critical password changes: the router's administrative password and the Wi-Fi network password (often called the passphrase). These two are the primary access points to my network, and securing them is paramount. I approached this with a sense of urgency, knowing that every moment I delayed, my network remained exposed. It was a proactive measure, a necessary defense against potential intrusions, and a significant step towards achieving genuine peace of mind regarding my home network's security.
Changing the Router’s Administrative Password
This was the very first password I tackled. After logging into my router's administrative interface using the default credentials (which I found on the sticker), I immediately navigated to the settings that control the router's login information. These are usually found under sections like "Administration," "System," "Maintenance," or "Security." The exact naming varies between router manufacturers, but the concept is the same. My aim was to change the username and password used to access the router's configuration pages.
I made sure to choose a strong, unique password for this, something that wasn't guessable, didn't contain personal information, and incorporated a mix of uppercase and lowercase letters, numbers, and symbols. I also considered changing the default username from "admin" if the router allowed it, adding another layer of obscurity. This step effectively locked down the "control panel" of my network, preventing unauthorized individuals from tampering with my settings, even if they somehow gained access to my internal network. I then wrote down this new password in a secure location, not on a sticky note attached to the router itself!
Updating My Wi-Fi Network Password (Passphrase)
The second crucial password change was for my actual Wi-Fi network – the password I use to connect my devices. Again, the default Wi-Fi password printed on the router sticker is a well-known vulnerability. I located the Wi-Fi security settings, typically found under "Wireless," "Wi-Fi," or "WLAN" sections. Here, I changed the default Wi-Fi password to a new, strong passphrase. I didn't just pick a random string of characters; I opted for a long, memorable phrase that was difficult to guess but easy for me to recall. Think of a sentence or a combination of unrelated words. For example, "MyCatLovesPizzaAndLongWalks!2023" is much stronger than "password123."
I also made sure to select WPA2 or, ideally, WPA3 encryption if my router supported it. WPA2 (Wi-Fi Protected Access II) is still the most common and robust encryption standard for home networks, while WPA3 offers even greater security for newer devices. Using older encryption types like WEP (Wired Equivalent Privacy) is a huge security risk, as WEP can be cracked in minutes. I verified that my network was using WPA2-PSK (AES) or WPA3.
After saving these changes, all my connected devices were temporarily disconnected. This was a clear indication that the new password had been applied successfully. I then reconnected each device using the new passphrase. These two password changes, executed swiftly and thoughtfully, significantly elevated the security posture of my entire home network in a matter of minutes.
+ Join Our Writing Community for FREE
Chain Story Online
Fun, free, flash fiction writing with writers just like you. You have ~100 words to begin a story or continue a story and make it yours.
Story Bible Studio
Digital space for writers to plot, plan, and build better stories. Designed by writers for writers. Your final draft awaits.
Obscuring My Network's Presence: SSID and DHCP Tweaks
With my passwords strengthened, I moved on to what I consider the "camouflage" stage of my Wi-Fi security overhaul. This involves making my network less obvious to casual snooping and better managing how devices connect. While these steps aren't impenetrable barriers on their own, they add layers of friction for anyone attempting to gain unauthorized access. I've learned that security isn't about a single, perfect solution, but rather a combination of multiple, reinforcing measures. My goal here was to obscure my network's presence and reduce the information it broadcasts to the outside world, making it less of an attractive target. This was a quick and effective way to add a degree of "stealth" to my digital fortress.
I focused on two main areas: broadcasting my Wi-Fi network name and controlling the automatic assignment of IP addresses. These tweaks, while seemingly minor, play a crucial role in reducing my network's visibility and making it slightly harder for an opportunistic attacker to enumerate its characteristics. I dedicated a few precious minutes of my ten-minute window to these adjustments, understanding that every small improvement contributed to the overall strength of my security posture. It was about making my network less "loud" and more discreet in the crowded digital airwaves.
Hiding My SSID (Network Name)
One of the quickest ways I found to add a layer of obscurity is to hide my Wi-Fi network's Service Set Identifier (SSID), which is essentially its name. While it won't deter a determined hacker with specialized tools, it certainly makes my network invisible to standard Wi-Fi scanners that casual users might employ. I navigated back into my router's administrative interface, usually under the "Wireless" or "Wi-Fi" settings, and looked for an option like "SSID Broadcast," "Broadcast Network Name," or "Visibility Status." I simply unchecked the box or selected "Disable" to prevent my network's name from being publicly broadcasted.
The immediate effect was that my Wi-Fi network no longer appeared in the list of available networks on my devices. To connect a new device, I now have to manually enter the SSID (network name) and the passphrase. While this adds a tiny bit of inconvenience when connecting a brand-new device, it’s a small price to pay for the added privacy.
It prevents my network from being an obvious beacon for everyone within range, reducing the chances of someone simply seeing my network and deciding to try their luck. It’s like drawing the curtains – it doesn’t stop a determined intruder, but it discourages casual peeping. I made sure to note down my SSID in a secure location alongside my Wi-Fi password, as I would need it for future connections.
Disabling WPS (Wi-Fi Protected Setup)
During my exploration of router settings, I often come across Wi-Fi Protected Setup, or WPS. While it promises easy device connections with a push of a button or a short PIN, I've learned that it's a significant security vulnerability. The PIN-based method, in particular, has a design flaw that makes it susceptible to brute-force attacks, allowing an attacker to crack it in a matter of hours, or even minutes, in some cases. Realizing this, I made it a point to disable WPS whenever possible. The setting is usually found in the "Wireless" or "Security" section of the router interface. I looked for options like "WPS Setup," "Push Button Connect," or "PIN Configuration" and ensured they were turned off.
If my router didn't offer the option to fully disable WPS, I at least avoided using its PIN feature. I understood that convenience often comes at the cost of security, and in this case, WPS was a trade-off I wasn't willing to make. Disabling it meant I had to manually enter my Wi-Fi password for new devices, but given the critical security hole it patches, it was a negligible inconvenience. This step is a quick win for security, eliminating a well-known exploit that could undermine all my other efforts to secure my network.
The Watchful Eye: Firmware Updates and Monitoring
With the immediate vulnerabilities addressed and my network somewhat camouflaged, I moved into the realm of ongoing maintenance and vigilance, which I liken to keeping a watchful eye over my digital fortress. Security isn't a one-time setup; it's an ongoing process. While I can't update firmware in 10 minutes, checking for updates and understanding the importance of regular checks can be done within that timeframe. This phase is about understanding the importance of keeping my defenses current and being aware of who or what is on my network. It's about proactive maintenance rather than reactive damage control. I recognized that even with strong passwords and hidden SSIDs, new vulnerabilities can emerge, and devices can connect without my explicit knowledge.
My focus here was on recognizing the critical need for regular firmware updates and developing a habit of network monitoring. While the actual update process might take longer than a minute, identifying if an update is available and understanding why it's important certainly falls within my rapid security audit. This section isn't just about implementation, but about embedding a security-conscious mindset into my routine. It's about equipping myself with the knowledge to maintain a secure network long after the initial ten-minute setup.
Checking for and Understanding Firmware Updates
Router firmware is essentially the operating system of my router. Just like the software on my computer or phone, it occasionally needs updates to patch security vulnerabilities, improve performance, and add new features. Neglecting firmware updates is like leaving known security holes unplugged. I made it a point to regularly check for new firmware versions. This is typically done through the router's administrative interface, usually under a section like "Administration," "Firmware Update," or "System Tools." I would look for an option to check for updates or download the latest firmware from the manufacturer's website.
While I wouldn't initiate a firmware update during my ten-minute security sprint (as it can take longer and requires my full attention), I would certainly identify if one was available and mentally schedule it for a convenient time. Understanding why these updates are important – to protect against newly discovered exploits and keep my router's defenses robust – is a crucial part of my security awareness. A quick scan for an "Update" button and a mental note to schedule the task is all it takes within the initial timeframe. This proactive approach ensures that my router benefits from the latest security patches, preventing attackers from exploiting known weaknesses.
Monitoring Connected Devices
Even with a strong Wi-Fi password, it’s good practice to periodically check which devices are connected to my network. This helps me identify any unauthorized users or unfamiliar devices that might have slipped through my defenses. Most routers provide a list of connected devices within their administrative interface, often under sections like "Attached Devices," "DHCP Clients," or "Network Map." I make it a habit to glance at this list occasionally. If I see an unfamiliar device, I can then take action, such as blocking its MAC address or investigating further.
This quick scan doesn't take long, perhaps a minute or two, but it provides a vital visual audit of my network's integrity. It's my way of being the watchful guard at the gate. If I spot something suspicious, it's a red flag that prompts a more thorough investigation. While not a "fix" in itself, knowing how to quickly check this list and understanding its importance is a fundamental aspect of maintaining a secure network. It’s an immediate feedback loop that tells me if my other security measures are holding up.
If you're looking to enhance your understanding of network security, you might find the article on the importance of strong passwords particularly useful. It delves into how a robust password can serve as the first line of defense for your Wi-Fi network. To read more about this essential topic, check out the article here.
If you're looking for a collaborative writing platform, check out Chain Story Online. It's a great way to connect with other writers and create stories together. Many users have found inspiration and creativity through Chain Story Online.
Advanced Safeguards: Considering Further Protection
After addressing the immediate and critical security vulnerabilities, I often spend a few extra moments contemplating more advanced safeguards. While these might push past the strict "10-minute" mark for full implementation, understanding their existence and the benefits they offer is valuable within my initial security audit. This section isn't about rushing into complex configurations, but rather about acknowledging the next steps I could take to further harden my network's defenses. It's about having a roadmap for continuous improvement and a deeper understanding of available security tools. I view these as additional layers of protection, beyond the basic necessities, that contribute to a truly robust digital fortress.
I recognize that the pursuit of perfect security is an ongoing journey, not a destination. Therefore, even within my rapid security check, I allocate time to consider these more nuanced options. They represent a commitment to ongoing vigilance and a desire to stay ahead of potential threats. These advanced safeguards, while not always necessary for everyone, provide an enhanced level of control and privacy that I personally value. They are the refinements to my security strategy, moving beyond the foundational steps to truly optimize my network's resilience against a wider range of attacks.
Implementing a Guest Network
One feature I strongly consider, and often enable if available, is a guest Wi-Fi network. This is a separate, isolated network that allows visitors to access the internet without having access to my primary network and its connected devices (like my computers, printers, or network-attached storage). I can set a different password for the guest network and often configure it with more restrictive access policies. This significantly enhances security because it limits the potential attack surface. If a guest's device is compromised, or if they unknowingly introduce malware, the infection is contained to the guest network and cannot spread to my personal devices.
Setting up a guest network is usually straightforward within the router's interface, often found under "Wireless" or "Guest Network" settings. I can typically enable it, give it a unique name, set a strong password, and even limit its bandwidth if I choose. This takes only a couple of minutes to configure, but the peace of mind it offers is immense. It's a pragmatic solution that balances hospitality with robust security, ensuring that my primary network remains pristine and protected.
MAC Address Filtering (with Caution)
MAC address filtering is a feature that allows me to specify exactly which devices are permitted to connect to my Wi-Fi network based on their unique MAC (Media Access Control) address. I think of it as a bouncer at the door, only letting in those on the approved guest list. While it sounds like a robust security measure, I approach it with caution. It's not a foolproof solution because MAC addresses can be "spoofed" or faked by determined attackers. However, it does add another hurdle for less sophisticated intruders and provides a basic level of control over who connects to my network.
I access this setting typically under "Wireless Security" or "MAC Filtering" in my router's interface. I can usually find the MAC addresses of my devices in their network settings. I then enter these addresses into the router's allowed list. While I wouldn't rely solely on MAC filtering for security, I see it as a useful supplemental measure. The main drawback is the administrative overhead: every new device I want to connect requires me to manually add its MAC address to the router's whitelist. If I have many devices or frequently get new ones, this can become tedious. I understand its limitations but acknowledge its potential as a secondary line of defense against casual intrusion.
DNS Settings and Parental Controls
Beyond basic connectivity, I also consider tweaking my router's DNS (Domain Name System) settings. By default, my router probably uses my ISP's DNS servers. However, I can manually configure it to use public DNS servers known for their enhanced security features, like blocking malicious websites or filtering adult content. Services like Cloudflare (1.1.1.1), Google DNS (8.8.8.8), or OpenDNS offer these benefits. Changing the DNS settings at the router level means all devices connected to my network will use these protective services automatically. This isn't strictly "Wi-Fi security" but "network security," which is closely intertwined.
Final Thoughts on Secure Your Wi-Fi
Additionally, many modern routers come with built-in parental control features. While my primary concern isn't always parental control, these features often include options to block specific websites, set internet access schedules, or even monitor internet usage. I consider enabling these for specific devices or for overall network hygiene, as they can prevent access to known dangerous sites or manage screen time effectively. Configuring these can take a few minutes, but the enhanced safety and control they offer are significant. It’s about tailoring my network not just for security, but for a safer and more controlled internet experience for everyone using it.
Next step: Want to go further? Read the best free tools for remote teams.
Related reading: Password Managers Explained: Do You Need One? · Smart Speakers: Useful Helper or Privacy Worry?
Enda Storrie is a writer and the creator of Story Bible, the planning journal and app for writers, and Chain Story Online, a free collaborative storytelling platform.